Are you eager to master how to break in your new Tesla brakes? Ensuring the safety and efficiency of your Tesla starts with the proper break-in of your brakes. This guide will walk you through necessary procedures without the fluff—covering everything from the initial gentle usage to the all-important cooling period—equipping you with the knowledge to optimize your Tesla’s braking performance.
Key Takeaways
- The break-in process for new Tesla brakes involves initial gentle application, a gradual increase in braking intensity, and a final cooling down phase to ensure optimal performance and longevity.
- Regular monitoring and maintenance, such as inspecting for wear, checking brake fluid levels, and seeking professional inspection in case of any issues, are crucial to sustain the brakes’ performance post-break-in.
- Maximizing regenerative braking benefits and understanding the role of mechanical brakes are essential for enhancing energy efficiency and ensuring safety in Tesla vehicles.
Step-by-Step Guide to Breaking in Your Tesla Brakes
To make sure your new Tesla’s brakes work well and last a long time, it’s important to follow the recommended steps for using them the first time. Tesla has a special process that involves driving and braking in a certain way, and then letting the brakes cool down. Let’s go through this process step by step in a simple way.
The first time you use your brakes, there are three main parts to the process: start with gentle braking, slowly brake harder over time, and finally, give the brakes time to cool down. This careful method helps your car’s brakes get ready for everyday driving while preventing damage during the first times you use them.
Initial Gentle Use
Initiating the break-in process with a period of cautious usage is essential to avoid the brake pads leaving impressions on the rotors. To achieve this, it is recommended that you:
- Maintain your speed within 50 to 55 mph.
- Apply gentle braking pressure to decelerate smoothly until reaching roughly 10 mph.
- Perform this cycle six times in succession for gradual heating of the brakes.
Such measured engagement of the brakes ensures that brake pads settle correctly against rotors, an imperative step for achieving peak performance from your braking system. It’s important throughout this stage not to bring your vehicle entirely to halt if possible since doing so may lead directly to imprinting by brake pads onto rotors.
Gradual Increment of Braking Intensity
Once you’ve gently broken in the brake pads, it’s time to increase the intensity of your braking. Incrementally intensifying both force and velocity during this stage will Embed the brake system. This crucial step aids in forming an even distribution of pad material on the rotors, thereby improving overall braking effectiveness.
Following Tesla’s guidelines for properly bedding new brakes involves several key actions.
- Maintain a speed within 50 to 55 mph.
- Use steady pressure on the brake to decelerate down to 10 mph.
- Perform this cycle six times with at least half-a-minute intervals for cooling purposes between each application of brakes. It is critical not to halt completely while performing these steps because doing so could result in embedding parts of the pads onto the surface of rotors.
During this enhanced phase, ensure that when applying brake pressure that you don’t bring your vehicle entirely to a stop. Stopping abruptly can risk transferring materials from pads onto rotoirs which could compromise smooth braking.
Cooling Down Phase
The cooling down phase represents the concluding part of the brake break-in process and is vital to its overall completion. Following a sequence of mild to strong stops, it’s imperative that the brakes are allowed ample time to cool off. This step safeguards the brake system’s functionality and avoids warping due to high heat levels.
During this critical stage in your Tesla, aim to drive without excessive use of brakes so that airflow can aid in their cooling. It’s during this period when allowing them to properly cool ensures that the brake pad resin sets correctly, which is crucial for achieving peak braking efficacy. Should you have any reservations or need guidance, reaching out directly to Tesla for support is recommended.
Monitoring Your Tesla’s Braking Performance
To keep your Tesla car’s brakes working well, it’s important to check them regularly. By watching how your brakes perform after the break-in, you can make sure your car can stop safely and smoothly.
This means paying attention to signs that the break-in is done and knowing when to get a professional to look at your brakes. Keeping an eye on these things will help make sure your Tesla’s brakes stay reliable for a long time.
Signs of Successful Break-In
To determine whether the break-in of your Tesla brakes has been effective, listen for a quiet and smooth operation during braking. Your Tesla should come to a halt gently and silently, free from any squeaks or harsh grinding sounds.
Keep in mind that the purpose of breaking in the brake system is to augment stopping capability while diminishing noise levels. Should you observe these enhancements subsequent to completing the break-in process, it’s an indication that the procedure was accomplished properly.
When to Seek Professional Inspection
Regular checks and careful attention will help keep your Tesla’s brakes working well. But sometimes, you might need a professional to take a closer look. Watch for these signs that it’s time for an expert to check your brakes:
- If you hear high-pitched noises or rough scraping sounds
- If the car shakes or the brake pedal vibrates when you use the brakes
- If the brake fluid level is low
- If warning lights turn on in your car’s dashboard
- If the brake pedal feels soft or easy to push down without much resistance
For example, if the brake pads on your Tesla Model 3 wear down too much, they will make a high-pitched noise to tell you they need to be checked and possibly changed. If your car has been in an accident that might affect how well the brakes work, it’s very important to have them checked by a professional, even if you don’t see any damage or hear any strange noises.
Maintaining Your Tesla’s Brakes Post-Break-In
After you have correctly broken in your Tesla’s brakes and learned how to check how they are working, it’s very important to take care of them. Here are some simple tips to remember:
- Look at your brakes often to see if they are wearing out or if there is any damage.
- Keep your brakes clean by removing dirt or other things that could make them work poorly.
- Check the level of brake fluid often and add more if you need to.
- Follow the schedule recommended by Tesla for replacing and servicing your brakes.
By doing these things, you can make sure your brakes stay in good shape and work well for a long time.
Taking care of your brakes is not just about making sure they work well now, but also about making them last longer. Let’s look at these care tips to help your Tesla’s brakes work well for many years.
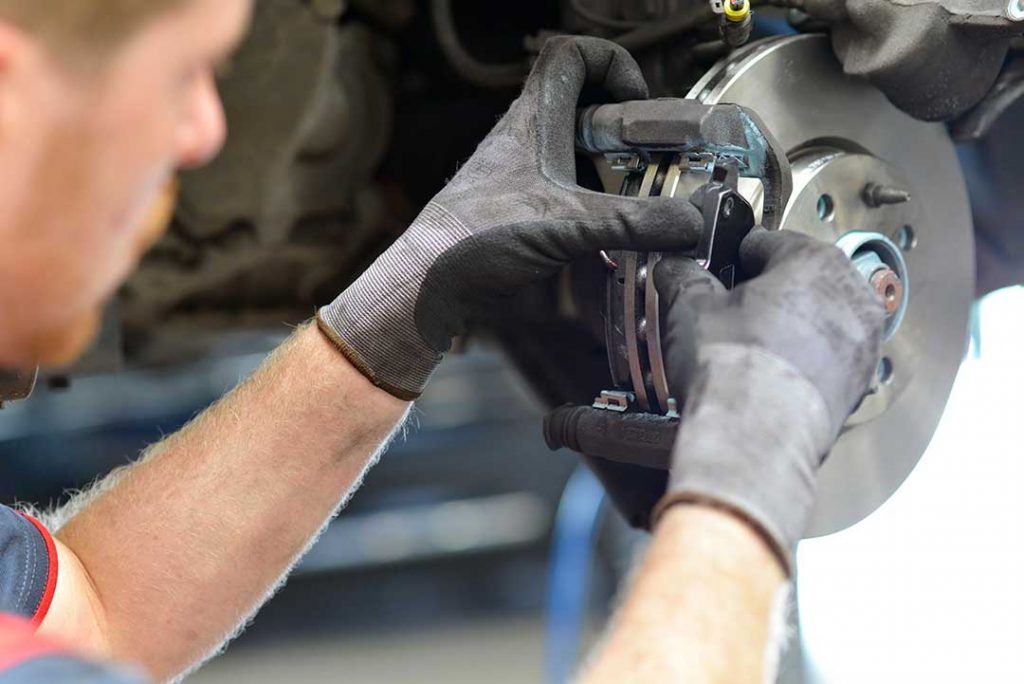
Regular Inspection and Cleaning
To keep your Tesla’s brakes safe and reliable, it’s important to check them often for signs of wear or damage. Look for brake pads that are very thin or rotors that have deep lines in them.
Keeping your brakes clean is also key to making sure they work well. Here’s how to clean your Tesla’s brakes:
- Use special brake cleaners and the right brushes.
- Depending on how much rust there is, you might need to clean gently or use more force.
- If you find parts like retaining pins, anti-rattle springs, or bolts that are too rusty, replace them during your brake maintenance.
Checking Brake Fluid Levels
To make sure your Tesla’s brakes work really well, it’s important to take care of not only the brake pads and rotors, but also to check the brake fluid level often. Brake fluid is very important because it helps your foot’s pressure on the pedal reach the brakes, making the car slow down smoothly.
Here’s what Tesla suggests for taking care of the brake fluid:
- Test the brake fluid for dirt every 2 years and change it if needed.
- Check the brake fluid more often if you use your brakes a lot, like when pulling heavy loads, driving down steep hills, or in hot and humid weather.
- If the brake fluid is too low or dirty, your car might not stop as it should. So, keeping an eye on it and taking care of it is very important for your safety.
Replacement and Service Schedules
It is very important to check your Tesla’s brakes regularly to make sure they are working well. A skilled mechanic should look at the brakes every 12,000 to 15,000 miles or as the car’s manual suggests.
Teslas are different from other cars because they don’t need to change the brake pads very often. This is because the car’s regenerative braking system reduces how much the pads wear out. However, Tesla still recommends that every year, or every 12,500 miles in places where roads are salted, you should clean and put oil on the brake calipers. Also, you should check the brake fluid every four years to keep the brakes working well beyond just watching for brake pad wear.
Regenerative Braking and Mechanical Brake Synergy
Tesla vehicles stand out due to the collaborative operation between regenerative braking and mechanical brakes, enhancing efficiency and prolonging the lifespan of traditional brake components. We will explore strategies for optimizing the advantages of regenerative braking while explaining how mechanical brakes contribute to your Tesla’s functioning.
Distinguished from conventional cars, Teslas utilize a distinctive method that recovers energy and channels it back into the vehicle’s battery during deceleration—this occurs when you ease off on the accelerator pedal. But what steps can be taken to fully leverage regenerative braking, and in which situations do mechanical brakes become involved?
Maximizing Regenerative Braking Benefits
To prolong the service life of mechanical brakes and fully harness regenerative braking advantages, one should adapt their driving habits accordingly. By grasping how electric braking operates—especially regenerative systems—and prioritizing it for slowing down the car, not only can you preserve your Tesla’s traditional brakes, but also boost its energy efficiency.
While an electric vehicle is charging, preconditioning ensures that optimal battery temperatures are reached, which bolsters regenerative braking effectiveness. By anticipating stops ahead and easing off the accelerator sooner rather than later, more energy is recaptured through regenerative deceleration to enhance both the recovery process and overall range—an upper hand when compared with a gas-powered car where this kind of energy capture system does not exist.
The Role of Mechanical Brakes
Regenerative braking is an outstanding function in Tesla vehicles that employ electric motors, yet the importance of mechanical brakes cannot be ignored. Your Tesla’s mechanical brakes deliver essential stopping force during emergencies and enhance regenerative braking when extra deceleration strength is needed.
During chilly weather or instances where the battery reaches full capacity, the capability of regenerative braking diminishes, rendering mechanical brakes exceptionally vital for preserving safety. Comprehending how regenerative and mechanical braking systems work together will help you maximize your Tesla’s overall braking efficiency while ensuring vehicular safety.
Summary
Breaking in your Tesla brakes is a crucial step in ensuring optimal performance and longevity. From initial gentle use, through increasing braking intensity, to the cooling down phase, the break-in process prepares your brakes for the rigors of everyday driving. Regular monitoring of your Tesla’s braking performance and adhering to recommended maintenance practices can further enhance the life and performance of your brakes.
Understanding the synergy between regenerative and mechanical braking can also help you maximize the benefits of your Tesla’s unique braking system. Whether you’re a new Tesla owner or an experienced driver, these guidelines can help you keep your Tesla brakes in top condition, ensuring smooth and safe rides for many miles ahead.
 UNITED STATES


:max_bytes(150000):strip_icc()/GettyImages-1494888410-c8b4c4bc55814f31bc437713b8467636.jpg)