Brake Pad Break-In Done Right: The Technician’s Complete Guide

You install new pads and rotors, torque everything to spec, pump the pedal, and hand the keys back. Customer drives off. Three days later, they’re on the phone complaining about vibration, noise, or a soft pedal.

You pull the car back in, and the rotors already have dark spots. The pads look uneven. And you’re eating labor on a comeback that shouldn’t exist.

Nine times out of ten, this is a break-in problem. The pads weren’t bedded correctly, and the friction surface never transferred properly to the rotor. It takes five minutes to do right. Skipping it creates hours of diagnostic work and wasted parts.

Why Break-In Matters (The Science in 60 Seconds)

Ceramic pads use adherent friction. During break-in, the pad deposits a thin, even layer of friction material onto the rotor surface. If that transfer film develops unevenly, you get hot spots, inconsistent friction, and pulsation.

Semi-metallic pads use abrasive friction. Break-in seats the pad surface against the rotor and establishes a consistent contact pattern.

In both cases, the break-in also burns off residual gases and volatile compounds from manufacturing. If those don’t burn off in a controlled way during bedding, they’ll cause green fade during normal driving.

The Standard Break-In Procedure

Step 1: Verify the installation. Pump the brake pedal several times to seat the pads. Confirm a firm pedal. Check for dragging or abnormal noise at very low speed.

Step 2: Perform 8 to 10 moderate stops. From approximately 35 mph, apply moderate brake pressure (about 60-70% of full force) to slow to about 10 mph. Do not come to a complete stop.

Step 3: Perform 2 to 3 slightly more aggressive stops. From approximately 45 mph, apply firmer pressure (about 80% of full force) to slow to about 15 mph. Avoid a complete stop.

Step 4: Cool down. Drive at moderate speed for 2 to 3 minutes without heavy braking.

Step 5: Avoid sitting on the brake. This is the part that matters most. After bedding stops, do not sit at a stoplight or parking spot with the brake pedal pressed. Hot pads clamped against a stationary rotor deposit a thick, uneven patch of friction material. That deposit creates a high spot you’ll feel as pulsation within the first week.

Adjustments by Pad Type

Ceramic Pads

The standard procedure above is designed primarily for ceramic formulations. Pay special attention to Step 5. For premium vehicle-specific pads like DFC 5000 Advanced, the transfer film develops more predictably because the friction compound is matched to the specific rotor.

Semi-Metallic Pads

Semi-metallic pads can handle slightly more aggressive break-in. Increase starting speed to 40 mph and apply slightly more pressure. For DFC Heavy Duty or DFC Ultimate Duty Performance pads, break-in is especially important because the first towing session shouldn’t be the uncontrolled break-in.

Performance Pads

DFC Active Performance pads are formulated for higher operating temperatures. From 50 to 60 mph, perform 8 to 10 progressively harder stops with 30 seconds between each. The final 2 to 3 stops should briefly activate ABS. Then do a 5-minute cool-down lap.

Police / Pursuit Pads

DFC Police pads are AMECA certified for pursuit-rated applications. Follow the performance procedure, then add 3 to 4 stops from 60 mph with firm braking.

The Post-Curing Advantage

Without post-curing: The first few hundred miles become the final curing stage. Inconsistent friction, more noise during break-in, and longer time before optimal performance.

With post-curing: Break-in is shorter and more predictable. The transfer film develops more evenly.

DFC post-cures 100% of its brake pads across every product line.

What Happens When Break-In Goes Wrong

Pad imprinting / material deposits. Dark spots on the rotor face from uneven pad material transfer. Causes pulsation that feels like a warped rotor. Usually from sitting on the brake with hot pads.

Glazing. The pad surface looks smooth and shiny with a blue or golden tint. The friction material was overheated without proper bedding. Light glazing can be scuffed with sandpaper and re-bedded. Heavy glazing means new pads.

Green fade. Brakes felt weak during the first few hard stops, then improved. Residual manufacturing gases pushing the pad away from the rotor. Post-cured pads virtually eliminate green fade.

Uneven wear patterns. Check that the caliper slides freely and hardware is correctly installed before blaming break-in.

The 60-Second Customer Explanation

“We’ve done the initial bedding on your new brakes, but they’ll continue to break in over the next hundred miles or so. During that time, avoid really hard braking if you can. And at red lights, try not to hold the brake pedal down hard. Light pedal pressure at stoplights is fine. The pads are still conditioning to the rotors.”

The Comeback Prevention Connection

Industry estimates suggest that improper pad bedding contributes to roughly 30% of brake-related warranty returns. Five minutes of bedding stops. Sixty seconds of customer education. Zero comebacks from break-in issues.

Find the right brake pads at dynamicfriction.com. Every DFC pad is 100% post-cured.

Break-in isn’t optional. It’s the final step of every quality brake installation.

Related: How to reduce brake job comebacks | Ceramic vs semi-metallic: a professional guide

What Is GeoSpec Coating? How Coated Rotors Reduce Come-Backs and Boost Shop Profits

Pull a bare, uncoated rotor off the shelf after it’s been sitting in your warehouse for three months. You know what you’re looking at. Surface rust across the friction faces, corrosion creeping along the edges and hat section, and that orange-brown film that tells every customer this part looks like it’s been sitting in a junkyard.

It’s cosmetic. Sort of. The surface rust wipes off, and a few stops will clean the friction face. But the edge corrosion and hat section rust? Those don’t go away. And on a vehicle with open-spoke wheels where the rotor is visible, that corrosion is what the customer sees every time they look at their car after the brake job you just charged them $600 for.

That’s why coated rotors went from a premium option to a standard expectation in the aftermarket.

Why Brake Rotors Corrode (And Why It’s Getting Worse)

Cast iron is an excellent material for brake rotors. It handles heat well, machines to precise tolerances, and provides a consistent friction surface. What it doesn’t do is resist corrosion.

Bare cast iron starts oxidizing the moment it’s exposed to moisture. This problem has gotten measurably worse:

Vehicles sit longer between drives. Remote work, multi-car households, and EVs with regenerative braking all mean rotors spend more time stationary and exposed to moisture.

Open-spoke wheel designs are everywhere. Modern 18, 19, and 20-inch wheels put the entire rotor on display. Visible corrosion is an immediate cosmetic complaint.

Road salt usage has increased. Northern states have increased salt application rates, and brine pre-treatment has become standard.

What Rotor Coatings Actually Do

1. Corrosion protection on non-friction surfaces. The hat section, outer edges, cooling vanes, and inner edges never contact the brake pad. A coating keeps moisture and salt from reaching the iron.

2. Shelf protection during storage. A coated rotor can sit in a warehouse for months and come out looking new.

3. Cosmetic appearance through the wheel. A silver or gray coated rotor looks professional and finished.

Not All Coatings Are the Same

Paint coatings are the most basic. A thin layer of paint tends to chip, peel, and degrade under thermal cycling. A paint-coated rotor might look good on the shelf but start showing corrosion within months on the vehicle.

Zinc plating is a step up. Better thermal cycling resistance, but can develop a white, powdery zinc oxide appearance over time.

Engineered proprietary coatings represent the top tier. These are purpose-built formulations designed specifically for brake rotor applications.

DFC’s GeoSpec coating falls into this category. It’s a patented corrosion-resistant finish engineered to withstand the thermal and environmental conditions specific to brake rotors. In salt spray testing, GeoSpec outperforms conventional zinc and paint coatings. The silver-gray finish maintains its appearance on the vehicle and provides long-term protection where corrosion hits hardest.

The Business Case for Coated Rotors

Fewer corrosion-related complaints. Hat section and edge corrosion on uncoated rotors is the number one cosmetic complaint on brake jobs. Coated rotors eliminate this category almost entirely.

Less prep time on installation. An uncoated rotor that’s been on the shelf needs the friction surface cleaned before installation. A GeoSpec Coated rotor comes out of the box ready to install.

Better shelf life for distributors. Uncoated rotors are a shelf life problem. Coated rotors sell through without that issue.

Higher perceived value. A coated rotor looks like a premium part. That perception translates to customer satisfaction, online reviews, and repeat business.

Upsell opportunity. Show the customer both options. The visual difference speaks for itself.

When Coating Matters Most

  • Vehicles with open-spoke or large-diameter wheels
  • Northern climate vehicles exposed to road salt
  • Low-mileage or infrequently driven vehicles
  • Fleet vehicles in mixed-climate operations
  • Any customer who has previously complained about rotor appearance

What About the Friction Surfaces?

On a quality coated rotor, the coating does not affect braking performance. The friction surfaces are either left uncoated or treated with a coating that burns off during the first few stops.

A coated friction surface can actually improve initial performance by preventing the surface rust that would otherwise need to be scrubbed off during the first few drives. That means a more consistent break-in period and a more even transfer film when paired with ceramic pads.

Pairing Coated Rotors with the Right Pads

DFC offers GeoSpec Coated Rotors as part of complete brake kits that include matched pads and hardware. Find the right rotor at dynamicfriction.com.

Rotor coatings have evolved from a cosmetic nice-to-have into a practical tool for reducing comebacks, cutting prep time, and maintaining customer satisfaction.

Related: The warped rotor myth and our complete guide to aftermarket brake rotors.

Brake Pad Friction Formulations Explained: What Your Shop Needs to Know

There’s a conversation that happens at the parts counter every day. Customer comes in for brake pads, and the counterperson asks the question: “Ceramic or semi-metallic?”

Most of the time, the answer comes down to price or whatever the customer had last time. Nobody explains the why behind the recommendation.

That’s a missed opportunity. Because when you understand friction at the formulation level, you can make better recommendations, charge appropriately for premium parts, and dramatically reduce the noise and vibration comebacks that eat into your shop’s profitability.

How Brake Pads Actually Stop a Vehicle

Before we get into the three main formulation types, you need to understand the two fundamental friction mechanisms that brake pads use.

Abrasive Friction

Think of this like sandpaper on wood. The pad and rotor surfaces physically grind against each other, breaking molecular bonds in both materials. Material gets removed from both the pad and the rotor with every stop.

Semi-metallic pads and some NAO formulations primarily use abrasive friction. That’s why semi-metallic pads tend to wear rotors faster and produce more dark, metallic brake dust.

Adherent Friction (Transfer Film)

This works completely differently. During the first few hundred miles of use, the pad transfers a microscopic layer of friction material onto the rotor surface. Once that transfer film is established, braking happens as pad material contacts pad material.

Ceramic pads and some premium NAO formulations use this adherent mechanism. That’s why ceramic pads produce lighter-colored dust and are generally easier on rotors.

Why this matters to your shop: If a customer comes back with dark spots on their rotors after a ceramic pad install, it usually means the proper break-in wasn’t done properly and the transfer film is uneven. That’s not a defective pad. That’s a bedding issue.

The Three Main Formulation Types

Semi-Metallic

What’s in them: 30-65% metal content by weight. Steel fibers, iron powder, graphite, and various friction modifiers held together with phenolic resin binders.

How they perform:

  • Strong initial bite, especially when cold
  • Excellent heat handling under sustained high temperatures
  • Predictable pedal feel under heavy, repeated braking
  • Higher rotor wear rate due to abrasive friction mechanism
  • More noise-prone than ceramic, especially in cold weather
  • Produce heavy, dark metallic dust

Where they make sense: Heavy trucks and SUVs with towing or payload. Performance applications. Fleet vehicles in stop-and-go duty cycles.

Ceramic

What’s in them: Ceramic fibers, various fillers, aramid fibers for structural integrity, and resin binders. Modern ceramics are copper-free to meet EPA regulations.

How they perform:

  • Quiet operation across a wide temperature range
  • Consistent, linear pedal feel
  • Light-colored dust that doesn’t adhere to wheels
  • Lower rotor wear
  • Slightly less initial bite when stone cold
  • Can fade under extreme, sustained heat

Where they make sense: Daily drivers, commuter vehicles, sedans, crossovers. European applications. Any customer who complains about brake dust.

NAO (Non-Asbestos Organic)

What’s in them: Glass fiber, rubber, carbon compounds, Kevlar or other aramid fibers, and resin.

How they perform:

  • Soft pedal feel with gentle initial engagement
  • Very quiet, especially at low speeds
  • Lowest dust production
  • Fastest wear rate, especially under heat
  • Not suitable for high-performance or heavy-duty applications

The Part Nobody Talks About: Vehicle-Specific Formulations

Here’s where the real quality difference shows up between brake pad brands. A cheap ceramic pad might use a single friction compound across 200 different applications. A premium one uses a formulation tested and tuned for the specific vehicle.

That difference shows up as noise on some applications, uneven wear, inconsistent pedal feel, or longer stopping distances.

DFC engineers vehicle-specific friction formulations. A DFC 5000 Advanced pad for a Toyota Camry has a different friction compound than one for a Ford F-150. Same product line, same quality standards, but the chemistry is matched to the application.

Post-Curing: The Manufacturing Step That Changes Everything

Most brake pads go through pressing and initial curing during manufacturing. What not every manufacturer does is post-cure the finished pad.

Post-curing is an additional heat treatment step that stabilizes the resin binders and burns off volatile compounds in the friction material.

Without post-curing: The first few hundred miles on the vehicle become the final curing stage. This causes inconsistent friction, more noise during break-in, and a longer period before the pad reaches optimal performance.

With post-curing: The pad arrives with a fully stabilized friction surface. Break-in is shorter and more predictable. The transfer film develops more evenly.

DFC post-cures 100% of its brake pads.

What This Means for Your Parts Counter

Match the formulation to the application, not the customer’s budget.

Don’t upsell by scaring people. Upsell by educating. Instead of “you need the more expensive pads,” explain why the heavy-duty formulation gives better heat management for their specific use case.

Ask about driving habits before recommending a pad type. Five questions that should be standard:

  1. What kind of driving do you mostly do?
  2. Do you tow anything regularly?
  3. Do you notice a lot of brake dust on your wheels?
  4. Any noise or vibration complaints?
  5. How long do you plan to keep the vehicle?

Choosing the Right Pad Line for Your Shop

Application Recommended Formulation DFC Product Line
Daily driver, sedan, crossover Ceramic DFC 3000 Ceramic
Daily driver, value option Semi-metallic DFC 3000 Semi-Metallic
Mixed driving, moderate performance Hybrid ceramic DFC 4000 HybriDynamic
Premium daily, extended pad life Advanced ceramic DFC 5000 Advanced
European applications Euro-specific ceramic DFC 5000 Euro Ceramic
Performance vehicles Performance ceramic DFC Active Performance
Trucks, towing, heavy payload Heavy-duty semi-metallic DFC Heavy Duty
Work trucks, extreme duty Maximum duty semi-metallic DFC Ultimate Duty Performance
Police and pursuit vehicles AMECA-certified high heat DFC Police

Find the right pad for your application at dynamicfriction.com.

Understanding friction formulations isn’t just academic. It’s the foundation of making better recommendations, reducing comebacks, and building the kind of brake service reputation that keeps customers coming back for the right reasons.

Related: Brake pad break-in guide | The true cost of cheap brake pads

Ceramic vs Semi-Metallic Brake Pads: The Professional’s Recommendation Guide

“Ceramic or semi-metallic?”

That question gets asked at the parts counter thousands of times a day across the country. And most of the time, the answer comes down to whatever the customer had before or whatever is cheapest on the shelf.

That’s not a recommendation. That’s a coin flip.

If you’re a technician, service writer, or counter professional, you should be able to explain why one type works better than the other for a specific vehicle and driving pattern. Not because it makes for good conversation, but because the wrong pad type on the wrong application is how you end up with noise complaints, comebacks, and customers who don’t trust your shop anymore.

Here’s how to get it right every time.

The Fundamental Difference (In 30 Seconds)

Ceramic and semi-metallic brake pads stop vehicles using two different friction mechanisms. Understanding this one concept explains almost everything about how each type behaves.

Semi-metallic pads use abrasive friction. The metal fibers in the pad physically grind against the rotor surface. Both the pad and rotor lose material with every stop. That’s why semi-metallic pads produce heavy, dark brake dust and tend to wear rotors faster.

Ceramic pads use adherent friction. During break-in procedure, the pad transfers a microscopic layer of friction material onto the rotor face. After that, braking happens as pad material contacts pad material. The rotor itself isn’t the primary wear surface. That’s why ceramic pads produce lighter dust and are easier on rotors.

Neither mechanism is better. They solve different problems. The trick is matching the mechanism to the vehicle and how the customer uses it.

Head-to-Head Comparison

Performance Factor Ceramic Semi-Metallic
Noise Quiet across most conditions Louder, especially cold or light braking
Brake Dust Light colored, doesn’t stick to wheels Heavy, dark, metallic dust
Cold Bite Slightly less aggressive when cold Strong initial bite even from cold
Heat Tolerance Good for normal driving, fades under extreme sustained heat Excellent under repeated hard braking and high heat
Rotor Wear Lower (adherent friction is gentler) Higher (abrasive friction removes rotor material)
Pedal Feel Consistent, linear Firm, more aggressive
Pad Life Longer in normal driving conditions Shorter in normal driving, longer under heavy-duty use
Cost Higher per set Lower per set
Best For Daily drivers, commuters, European vehicles Trucks, towing, fleet, performance

When to Recommend Ceramic

Ceramic is the right call for about 80% of the vehicles that come through a typical shop. Here’s the profile:

Sedans, crossovers, and compact SUVs in daily driving. A 2024 Toyota Camry that commutes 30 miles each way doesn’t need the heat management of semi-metallic. Ceramic gives that customer quieter brakes, less dust on the wheels, and longer combined pad and rotor life.

European vehicles. European brake systems are designed around specific friction coefficients and NVH targets. A BMW 3 Series or Mercedes C-Class with semi-metallic pads will be louder than the owner expects. Euro-specific ceramic formulations (like DFC 5000 Euro Ceramic) are engineered to match OE friction characteristics for these platforms.

Any customer who complains about brake dust. If someone walks in and the first thing they mention is black dust all over their wheels, that’s a ceramic customer. Full stop.

Vehicles that sit for days between drives. Ceramic pads are less prone to creating the kind of surface corrosion issues that develop when semi-metallic pads sit against a rotor in humid conditions.

The customer who values quiet operation. Ceramic formulations dampen the high-frequency vibrations that cause brake squeal better than semi-metallic.

When to Recommend Semi-Metallic

Semi-metallic pads exist because some applications generate more heat than ceramic can handle. Period. That’s the deciding factor.

Full-size trucks and SUVs that tow. A Ford F-250 pulling a 10,000-pound trailer down a mountain grade needs pads that can absorb and dissipate enormous amounts of heat without fading. Semi-metallic formulations handle that.

Fleet vehicles in stop-and-go duty cycles. Delivery vans, service trucks, and utility vehicles that spend all day in city traffic with frequent hard stops. For heavy fleet applications, DFC Heavy Duty and DFC Ultimate Duty Performance pads are formulated specifically for these duty cycles.

Performance driving. If your customer tracks their car, autocrosses, or drives aggressively, semi-metallic (or DFC Active Performance) gives them the heat resistance and aggressive bite they need.

Police and first responder vehicles. DFC Police pads are AMECA certified and designed for pursuit duty cycles.

Work trucks with regular heavy loads. Landscapers, contractors, tow trucks. These vehicles operate at or near GVWR regularly.

The Gray Area: When It Could Go Either Way

Mid-size SUVs that occasionally tow. A Chevy Tahoe that tows a boat twice a summer? Ceramic is fine. That same Tahoe towing a 6,000-pound camper every other weekend? Semi-metallic.

DFC 4000 HybriDynamic pads blend ceramic and semi-metallic properties to handle mixed driving patterns without the noise penalty of full semi-metallic or the heat limitations of full ceramic.

Older vehicles with drum/disc combination brakes. The front brakes do most of the work, so a semi-metallic front pad paired with the drum shoe setup in the rear often makes sense.

Customer preference conflicts with the application. Explain the tradeoffs honestly. Set expectations and let them decide.

The Quality Variable That Matters More Than Type

The quality gap between a cheap pad and a good pad within the same category is bigger than the gap between ceramic and semi-metallic in most applications.

What separates a quality pad from a cheap one:

Vehicle-specific formulations. A DFC 5000 Advanced pad for a Honda CR-V uses a different friction compound than a DFC 5000 Advanced pad for a Ram 1500. Budget brands use one compound across hundreds of applications.

Post-curing. DFC post-cures 100% of its brake pads, stabilizing friction material before the pad ships.

Material quality. Better raw materials, tighter tolerances on fiber length and distribution, more consistent resin binders.

Backing plate quality. Precision-stamped plates with controlled flatness tolerances prevent noise and uneven wear.

The Counter Conversation: A Script That Works

Step 1: What’s the vehicle? Sedan or crossover? Almost certainly ceramic. Full-size truck? Depends on usage.

Step 2: How do they use it? “Do you tow anything regularly?” and “What kind of driving do you mostly do?”

Step 3: Any complaints about the current setup? Dust = ceramic. Fade = semi-metallic. Noise = specific formulation issue.

Step 4: Match the recommendation to the application.

Vehicle Type Primary Use Recommendation DFC Product
Sedan / Compact Daily driving Ceramic DFC 3000 Ceramic or DFC 5000 Advanced
Mid-size SUV / Crossover Daily driving Ceramic DFC 5000 Advanced
Mid-size SUV Mixed with light towing Hybrid DFC 4000 HybriDynamic
Full-size truck Daily, no towing Ceramic or Hybrid DFC 5000 Advanced or DFC 4000 HybriDynamic
Full-size truck Regular towing Semi-metallic DFC Heavy Duty
Work truck / Commercial Heavy-duty daily Semi-metallic DFC Ultimate Duty Performance
European sedan / SUV Any Euro ceramic DFC 5000 Euro Ceramic
Performance vehicle Spirited / track Performance DFC Active Performance
Police / First responder Pursuit rated AMECA certified DFC Police

Step 5: Set expectations. If switching from semi-metallic to ceramic, tell them the pedal will feel different. If switching the other way, warn them about dust and noise.

One More Thing: Matched Components Matter

A ceramic pad on a cheap rotor with inconsistent metallurgy won’t perform like a ceramic pad on a quality rotor. When the pad and rotor are designed as a system, break-in is faster, the transfer film develops more evenly, and NVH performance is better.

DFC offers complete brake kits with matched pads, rotors, and hardware. Find the right kit at dynamicfriction.com.

The ceramic vs semi-metallic question doesn’t have a universal answer. But it does have a right answer for every specific vehicle and driver.

The Warped Rotor Myth: What Actually Causes Brake Pulsation (And How to Fix It for Good)

Every technician has heard it. The customer walks in, grabs the counter, and says those two words: “warped rotors.”

And for decades, that’s exactly what the industry called it. Warped rotors. The diagnosis that explains the shudder in the steering wheel, the pulsing brake pedal, the vibration that gets worse the harder you stop. Simple enough, right?

Here’s the problem. Rotors don’t actually warp.

Not in any way that matches what most people mean when they say it. And if your shop keeps diagnosing brake pulsation as “warped rotors” without understanding what’s really going on underneath, you’re setting yourself up for comebacks, lost labor hours, and frustrated customers who keep coming back with the same complaint three months later.

Let’s talk about what’s really happening. Because once you understand it, you can fix it right the first time and stop chasing the same problem on every brake job.

Why Brake Rotors Can’t “Warp” Under Normal Driving

Cast iron brake rotors are manufactured at temperatures between 2,500 and 2,800 degrees Fahrenheit. That’s the temperature of molten iron being poured into a mold. To physically distort that casting after it’s cooled and machined, you’d need to hit it with similar heat.

Your customer’s Camry isn’t doing that. Not even close.

During normal driving, brake rotors operate between 200 and 400 degrees Fahrenheit. Hard braking on a steep mountain grade might push them to 600 or 700 degrees. Even a track day in a sports car rarely gets rotors above 900 degrees consistently.

To actually warp a cast iron rotor (meaning to permanently deform its shape through heat), you’d need to sustain temperatures above 1,000 to 1,200 degrees Fahrenheit across the rotor unevenly. That doesn’t happen in normal or even aggressive street driving.

So if the rotor isn’t warped, why does the brake pedal pulse?

The Real Culprit: Disc Thickness Variation

The answer is disc thickness variation, or DTV. This is the measurable difference in thickness between the thickest and thinnest points of the rotor as it rotates. When that variation gets large enough (usually more than 0.001 inches, depending on the application), the brake pad displacement changes as the rotor spins through the caliper. That fluctuation pushes and pulls the piston, which moves the brake fluid, which pulses the pedal.

That’s not warping. That’s uneven wear.

And here’s what matters to you as a tech or a shop owner: DTV is almost always caused by something that happened during the last brake job. Not by how the customer drives.

How Lateral Runout Creates DTV

The root cause of most disc thickness variation is lateral runout. That’s the side-to-side wobble of the rotor as it spins on the hub.

Picture it like this. If a rotor has even 0.002 inches of lateral runout, one spot on the rotor face is slightly closer to the brake pad than the rest. Every time the wheel rotates, that high spot makes contact with the pad. Over thousands of rotations, two things happen depending on your pad type:

With semi-metallic pads: The pad scrapes material off the rotor at the high spot. The rotor gets thinner in that area. Over time, you get a measurable thickness variation that causes pulsation.

With ceramic pads: The pad deposits friction material onto the rotor at the high spot. The rotor gets thicker in that area. Same result, different mechanism. Same pulsation.

Either way, you end up with a rotor that has uneven thickness. And either way, the customer comes back complaining about a vibration that wasn’t there when they picked up the car.

The Five Things That Actually Cause Brake Pulsation

If you want to eliminate brake pulsation complaints (and the comebacks that come with them), focus on these five causes. Every single one is preventable during a quality brake job.

1. Rust and Debris on the Hub Mounting Surface

This is the number one cause of lateral runout in the field. Period.

When a rotor sits on a hub that has corrosion buildup, rust scale, or road debris on the mounting face, the rotor can’t sit flat. Even a few thousandths of an inch of rust between the hub and rotor creates enough runout to eventually cause DTV.

The fix: Clean the hub face every single time you install a rotor. Wire brush it. Use a hub cleaning tool. Get the rust off. This takes 60 seconds and prevents 80% of pulsation comebacks.

2. Improper Lug Nut Torque

This one gets overlooked constantly, especially in busy shops where impact guns are doing the final tightening.

When lug nuts are torqued unevenly (which happens every time you rattle them down with an impact instead of using a torque wrench), the rotor mounting face gets pulled into a slight cone shape. That creates lateral runout from the start.

The fix: Hand-torque lug nuts in a star pattern to the manufacturer’s spec. Every time. No exceptions. Yes, it takes an extra minute. That minute saves you the 45 minutes of diagnosing a comeback.

3. Over-Tightening with Impact Guns

Related to the above, but worth calling out separately. Pneumatic impact guns can easily exceed the torque spec for wheel fasteners, which not only creates uneven clamping force but can also damage the threads and hub face over time.

The fix: Use the impact to snug the lug nuts, then finish with a calibrated torque wrench. Train every tech in the shop to do this consistently.

4. Pad Material Deposits (Pad Imprinting)

When new brake pads aren’t properly broken in, friction material can transfer unevenly onto the rotor surface. This creates high spots of deposited material that act just like thickness variation, producing a pulsation that the customer notices within the first few hundred miles.

This is especially common with ceramic formulations that rely on an adherent friction mechanism (transferring a thin, even layer of pad material onto the rotor face). If that initial transfer is uneven because the pads weren’t bedded properly, you get deposits instead of a uniform film.

The fix: Follow the pad manufacturer’s break-in procedure. For most applications, that means a series of moderate stops from 30-35 mph followed by a cool-down period. Don’t skip this step, and tell the customer not to sit on the brakes at a stoplight right after the install. That’s how you get pad imprinting.

One advantage of post-cured brake pads (like DFC’s entire lineup) is that the curing process stabilizes the friction material before it ever goes on the vehicle. That means more consistent pad transfer during break-in and a more uniform friction film on the rotor. It’s a small manufacturing detail that makes a real difference in the field.

5. Low-Quality Rotor Castings

Not all rotors are created equal. Cheap offshore castings can have inconsistencies in the iron metallurgy, uneven cooling during manufacturing, or poor machining tolerances. Those inconsistencies might not show up as lateral runout on a new rotor, but they accelerate the development of DTV once the rotor is in service.

The fix: Use rotors that are electronically inspected for runout, thickness variation, and dimensional accuracy before they ship. DFC runs every rotor through a 100% electronic inspection station that measures over 20 attributes to ensure OE-level specs. That kind of quality control eliminates the manufacturing variables that contribute to premature DTV.

How to Measure for DTV and Lateral Runout

If a customer comes in with a pulsation complaint, here’s the diagnostic process that actually identifies the root cause instead of just throwing parts at it.

Measuring Lateral Runout

  1. Mount a dial indicator on a fixed point (the caliper bracket or a magnetic base on the knuckle)
  2. Position the indicator tip against the rotor face, about 1 inch from the outer edge
  3. Rotate the rotor 360 degrees by hand
  4. Record the total indicator reading (TIR). Most manufacturers spec lateral runout at 0.002 inches or less

If runout exceeds spec, the rotor needs to come off. Clean the hub face, reinstall, and re-measure. If runout is still out of spec with a clean hub, the rotor itself may need to be replaced, or the hub assembly may have bearing wear contributing to the wobble.

Measuring Disc Thickness Variation

  1. Use an outside micrometer (not a caliper, you need the precision)
  2. Take thickness measurements at 8 to 12 equally spaced points around the rotor
  3. Record the difference between the thickest and thinnest readings
  4. Most manufacturers spec DTV at 0.001 inches or less

If DTV exceeds spec, the rotor needs to be replaced. Resurfacing can temporarily correct thickness variation, but if the underlying runout issue isn’t addressed, the DTV will come right back.

The Corrosion Factor: Why This Problem Is Getting Worse

There’s a reason brake pulsation complaints have increased over the past decade, and it’s not because rotors are getting worse. It’s because vehicles sit more.

Remote work, hybrid schedules, multicar households, and the rise of EVs with regenerative braking all mean that brake rotors spend more time sitting still, collecting moisture, and building up surface rust. That corrosion creates uneven surfaces that accelerate DTV development, especially on vehicles that sit for days between drives.

This is one reason coated rotors have gone from a “nice to have” to a “need to have” for shops that want to reduce pulsation comebacks. A quality corrosion-resistant coating (like DFC’s GeoSpec finish) protects the non-friction surfaces and the edges of the rotor from the rust buildup that contributes to runout over time. It also keeps rotors looking clean on the shelf, which matters if you’re a distributor managing inventory.

The Comeback Prevention Checklist

Print this out. Tape it to the wall in every bay. Follow it on every brake job and your pulsation comeback rate will drop to nearly zero.

  • Clean the hub mounting face (wire brush or hub cleaning tool)
  • Inspect the hub face for deep pitting or damage
  • Install rotor and check lateral runout with a dial indicator before installing pads
  • If runout exceeds 0.002″, reposition the rotor on the hub or address the hub surface
  • Install pads and hardware per manufacturer instructions
  • Torque lug nuts in a star pattern to manufacturer spec with a calibrated torque wrench
  • Perform proper pad break-in procedure (series of moderate stops, allow cool-down)
  • Advise customer: avoid heavy braking for the first 100 miles, don’t sit on the brake at stoplights during the break-in period

Stop Saying “Warped Rotors”

Language matters. When we tell customers their rotors are warped, we’re setting an expectation that rotors just do that on their own and there’s nothing anyone can do about it. That leads to repeated rotor replacements that don’t fix the actual problem, which means the customer keeps coming back with the same complaint and eventually loses trust in your shop.

When you explain that the pulsation is caused by thickness variation from a contaminated hub surface or improper torque, you’re telling the customer something different: this is preventable. We know how to fix it correctly. And when we do, it stays fixed.

That’s the difference between a shop that churns through brake jobs and a shop that builds a reputation for doing it right.

Choosing the Right Rotor to Minimize DTV

Not every rotor gives you the same starting point. Here’s what to look for when selecting rotors that resist DTV development:

Consistent metallurgy. Premium iron castings (G3000/G11H18 spec) with controlled carbon content provide more uniform wear characteristics than budget castings with inconsistent alloy composition.

Tight manufacturing tolerances. Rotors that are electronically inspected for runout and parallelism out of the box give you a better starting point. If the rotor has 0.001″ of runout before it ever goes on the vehicle, you’re already halfway to the DTV threshold.

Corrosion protection. Coated rotors reduce the surface rust that contributes to uneven pad contact and accelerated thickness variation. This matters more now than ever, with vehicles sitting longer between drives.

DFC’s rotor lineup is built with all three of these factors in mind. Every rotor passes a 100% electronic inspection measuring over 20 attributes. The Carbon Alloy line uses enhanced iron formulations for better wear characteristics. And the GeoSpec Coated line adds a patented corrosion-resistant finish that outperforms conventional zinc and paint coatings in salt spray testing.

Find DFC rotors for your application at dynamicfriction.com.

The “warped rotor” myth has been around for decades, but the science is clear: brake pulsation is caused by disc thickness variation and lateral runout, not by heat warping. Proper installation technique, quality components, and attention to the hub mounting surface are what separate a brake job that lasts from one that comes back in 90 days.

How EV Brakes Are Transforming Electric Vehicle Design

DFC Blog

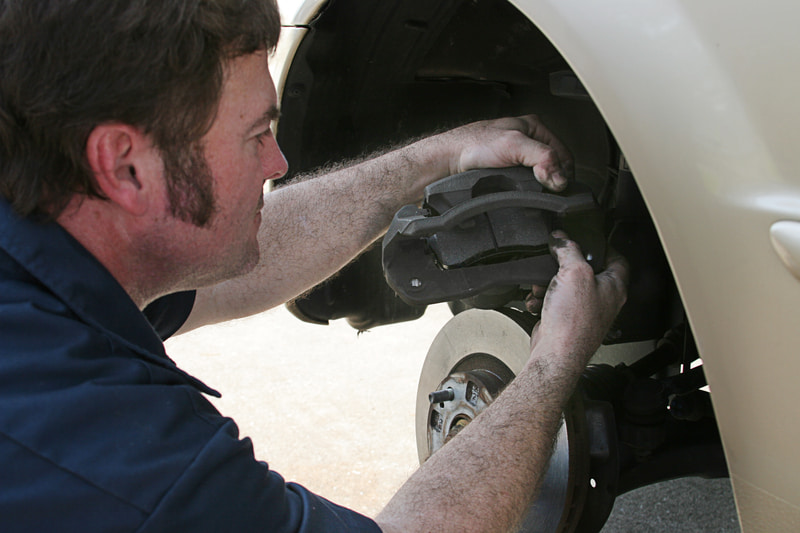
The rise of electric cars and electric vehicles (EVs) is reshaping the automotive industry, and braking systems are no exception. Traditional friction-based brakes are giving way to innovative designs, improving efficiency, longevity, and performance. Mechanics and auto industry professionals must understand these advancements to stay ahead of the curve.

1. Introduction to Electric Vehicle Braking Systems

Electric vehicle braking systems are designed to provide safe and efficient stopping power while also recovering kinetic energy and converting it into electrical energy. These systems are a crucial component of electric vehicles, as they enable the recovery of energy that would otherwise be lost as heat during braking. Electric vehicle braking systems typically consist of a combination of regenerative braking and traditional friction braking. Regenerative braking uses the electric motor to capture kinetic energy and convert it into electrical energy, which is then stored in the vehicle’s battery. Traditional friction braking uses brake pads and rotors to slow the vehicle down. The combination of these two braking systems allows electric vehicles to achieve improved energy efficiency and reduced wear on brake components.

Regenerative Braking: A Game Changer in Kinetic Energy Recovery

One of the biggest changes in electric vehicle brake design is regenerative braking. Unlike conventional brakes, the brake system in electric vehicles incorporates regen braking to slow the vehicle by converting kinetic energy into electricity, which is then stored in the battery.

Benefits of Regenerative Braking:

Reduces brake wear by minimizing friction brake usage through the regenerative braking system ✔ Improves energy efficiency and extends driving range ✔ Enhances vehicle control through smoother deceleration

What This Means for Mechanics:

🔧 Unlike traditional brake pads, EV brake pads and rotors last significantly longer, requiring fewer replacements.

🔧 Less wear means fewer brake dust emissions, making EVs more environmentally friendly.

🔧 Shops must adapt maintenance strategies, focusing on brake lubrication and caliper service instead of frequent pad replacements.

3. Types of Brakes Used in Electric Vehicles

Electric vehicles use a variety of brake types, including regenerative brakes, friction brakes, and electrohydraulic brakes. Regenerative brakes are the primary braking system used in electric vehicles, as they capture kinetic energy and convert it into electrical energy. Friction brakes are used in conjunction with regenerative brakes to provide additional stopping power when needed. Electrohydraulic brakes are used in some electric vehicles to provide a balance between regenerative and friction braking. These brakes use an electric motor to control the hydraulic system that applies pressure to the brake pads.

2. Lighter Brake Components for Efficiency

Since EVs are heavier than gas-powered cars due to large battery packs, manufacturers are turning to lighter brake materials like metallic brake pads, which are known for their superior heat dissipation and suitability for high-performance driving, to improve efficiency.

New Innovations in EV Brake Materials:

🚗 Carbon-ceramic rotors – Lighter and more durable than traditional cast iron 🚗 Aluminum brake calipers – Reduce weight while maintaining strength 🚗 Advanced coatings – Protect brake surfaces from rust due to infrequent use

Why This Matters: Lighter materials reduce unsprung weight, leading to better handling and longer range. Additionally, these innovations enhance the conversion of kinetic energy into mechanical energy during regenerative braking, improving overall energy efficiency.

3. Shift Towards Rear Drum Brakes in EVs

Surprisingly, some EV manufacturers (such Volkswagen) are reintroducing rear drum brakes as part of their brake systems. While drum brakes were largely phased out in favor of disc brakes, EVs are bringing them back for efficiency.

Why Some EVs Use Rear Drum Brakes:

Less brake dust – Drums are enclosed, reducing emissions ✔ Lower maintenance – Less exposure to debris and moisture ✔ Better for regenerative braking – Vehicle manufacturers are focusing on the efficiency of regenerative braking systems to enhance energy recovery from braking in hybrid and electric vehicles. Drums complement regen braking systems

The Impact of Reduced Brake Use on Brake Pads Maintenance

Because the brake pedal in EVs is used less frequently, mechanics must rethink traditional maintenance schedules. The biggest challenges include:

🛠 Corrosion and rust buildup – Less frequent use means moisture can accumulate on rotors. 🛠 Seized calipers – Without regular actuation, caliper pistons can stick. 🛠 Brake fluid contamination – EVs still require periodic fluid changes to maintain hydraulic system integrity.

Best Practices for EV Brake Maintenance:

✅ Perform regular inspections to check for rust buildup and ensure optimal recovery of initial kinetic energy during braking events.

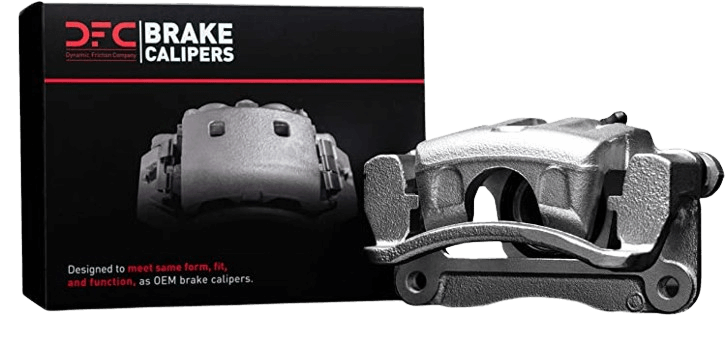
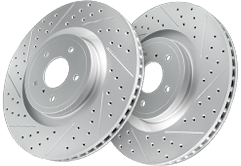
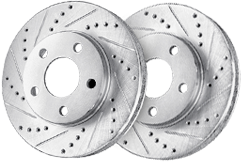
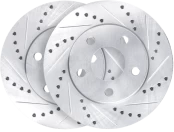
✅ Use coated rotors like DFC GeoSpec Coated Brake Rotors to resist corrosion.

✅ Lubricate caliper slides to prevent sticking.

7. Electric Vehicle Braking Systems and Energy Efficiency

Electric vehicle braking systems are designed to provide improved energy efficiency by recovering kinetic energy and converting it into electrical energy. Regenerative braking is a key component of electric vehicle braking systems, as it captures kinetic energy and converts it into electrical energy. This energy is then stored in the vehicle’s battery and can be used to power the vehicle’s electrical systems. Electric vehicle braking systems can achieve energy efficiency of up to 70% or more, depending on the vehicle and driving conditions. This is significantly higher than traditional friction braking systems, which typically achieve energy efficiency of around 10-20%. The improved energy efficiency of electric vehicle braking systems can lead to increased driving range and reduced energy consumption.

5. The Future of Brake-by-Wire Technology

EVs are pushing the industry toward brake-by-wire systems, which replace traditional hydraulic systems with electronic controls and leverage electric motors for regenerative braking. This technology offers:

🔹 Faster response times for improved safety 🔹 Adjustable braking feel to optimize performance 🔹 Reduced weight and complexity compared to hydraulic systems

Some EVs, like the Tesla Model S Plaid, are already experimenting with fully electronic braking systems.

Final Thoughts

Electric vehicle brake design, compared to traditional brakes, is evolving rapidly, reducing maintenance needs, increasing efficiency, and introducing new materials. As EV adoption grows, mechanics and parts distributors must stay informed on these changes.

For brake parts designed for modern vehicles, check out DFC’s high-performance brake solutions—engineered for durability, efficiency, and cutting-edge braking technology.

Best Practices for Brake Maintenance: Preventing Common Brake Issues for Mechanics

DFC Blog

Build Trust and Reliability—One Brake Job at a Time

Brakes are one of the most critical safety systems in any vehicle—yet they’re often overlooked until something goes wrong. As a technician or shop owner, preventative brake maintenance is key not only to protecting your customers but also to reducing comebacks and strengthening your reputation.

From worn pads to fluid contamination and ABS diagnostics, this guide outlines practical strategies to help mechanics prevent the most common brake problems—with solutions backed by DFC’s trusted product line.


1. Know Your Brake System Inside and Out

Understanding how braking components work together allows you to identify early signs of wear and recommend proper service intervals.

Pads & Rotors
When the brake pedal is pressed, pads clamp down on rotors to generate friction and slow the vehicle. Worn pads or overheated rotors reduce stopping power and increase risk.

Drum vs. Disc Brakes
Disc brakes provide stronger, more consistent performance and are easier to maintain—making them standard on modern vehicles. Drum brakes are still used on some rear applications and require different service considerations.


2. Stop Premature Brake Pad Wear

Uneven or rapid pad wear is one of the most common (and avoidable) issues in the bay.

Common Causes:

  • Inferior-quality pads
  • Sticking calipers or dry guide pins
  • Hard braking or aggressive driving
  • Overloaded vehicles and towing

Prevention Tips:

  • Use high-quality pads like DFC 5000 Advanced Brake Pads
  • Clean and lubricate caliper slide pins at every service
  • Inspect for even wear across all pads
  • Educate customers on proper braking habits

3. Address Brake Noise Before It Becomes a Comeback

Squeaks, squeals, and grinding can indicate pad glazing, misaligned hardware, or debris. Customers often interpret noise as poor workmanship—even when the cause is unrelated.

Fix It Right:

  • Resurface or replace rotors showing excessive wear or scoring
  • Use DFC brake hardware kits to eliminate movement and vibration
  • Apply noise-reducing lube to contact points (never pad or rotor surfaces)

4. Prevent Rotor Warping and Vibration Complaints

Brake pulsation often points to warped rotors—a problem that undermines performance and drives customer dissatisfaction.

Common Causes:

  • Excessive heat from aggressive braking
  • Improper lug nut torque
  • Low-grade or unbalanced rotors

Prevention Tips:

  • Upgrade to DFC Carbon Alloy Rotors with superior heat tolerance
  • Always torque lugs to factory specs using a torque wrench
  • Encourage smooth, progressive braking for better rotor longevity

5. Avoid Brake Fluid Contamination

Brake fluid absorbs moisture over time, reducing braking performance and damaging internal components. A spongy pedal or ABS light may point to degraded fluid.

Watch for:

  • Soft brake pedal
  • ABS warning lights
  • Dark, dirty, or discolored fluid

Best Practices:

  • Flush fluid every 2 years or as recommended
  • Use premium DOT 3 or DOT 4 brake fluid depending on OEM spec
  • Bleed system properly to remove air

6. Don’t Overlook Brake Lines and Hoses

Even if the pads and rotors look good, the system is only as strong as its weakest link. Old or damaged hoses can leak or fail under pressure.

Inspection Checklist:

  • Look for cracks, bulges, or dry rot in rubber lines
  • Inspect metal lines for corrosion or surface rust
  • Replace with DOT-approved parts to maintain system integrity

7. Diagnose ABS Issues Accurately

ABS lights are a top concern among drivers. When illuminated, they signal potential failure in one of the most important safety systems.

What to Know:
The ABS system prevents wheel lock-up during emergency stops. Ignoring a fault can lead to reduced braking control, especially in wet or slippery conditions.

Recommended Steps:

  • Scan for fault codes with a diagnostic tool
  • Inspect wheel speed sensors and ABS modules
  • Check for contaminated or old brake fluid contributing to the fault
  • Verify system resets post-repair

Final Thoughts

By following these brake maintenance best practices, you help your customers avoid costly issues while building a reputation for thorough, professional service.

  • Use premium-grade DFC pads, rotors, and hardware for proven durability and performance
  • Perform complete inspections, not just pad swaps
  • Educate customers on signs of wear and when to return for service

Trusted by Professionals. Proven in the Bay.

Looking for OEM-quality components that deliver under pressure?
Dynamic Friction Company offers a full line of brake pads, rotors, hardware kits, and fluids designed to meet the demands of today’s vehicles—and the shops that service them.

Browse DFC Brake Solutions
Contact Us for expert recommendations.

Towing Safety: Best Practices for Braking Downhill

DFC Blog

Stay in Control on Every Descent

Towing heavy loads downhill poses a serious challenge—even for experienced drivers. One of the greatest risks is brake fade, a condition where braking effectiveness decreases due to heat buildup during prolonged or repeated braking. Without proper technique and high-performance components, this can lead to dangerously long stopping distances and increased wear on your brake system.

Whether you’re hauling a trailer, camper, or heavy-duty equipment, the following best practices will help you brake safely, extend component life, and maintain full control on steep descents.


1. Know Your Braking System

Before every trip, confirm that your vehicle and trailer braking systems are fully functional. Don’t overlook any component—especially when towing under load.

Key Safety Checks:

  • Inspect brake pads and rotors for wear or glazing
  • Check brake fluid levels and quality
  • Test the trailer brake controller and emergency braking system
  • Confirm your vehicle’s integrated braking systems (ABS, stability control) are functioning properly

2. Perform a Pre-Trip Inspection

A thorough pre-trip inspection ensures reliability and performance throughout your towing journey. Focus especially on the braking and suspension systems.

Critical Items to Inspect:

  • Brake System: Pads, fluid levels, brake lines, calipers or drums
  • Trailer Brakes: Check controller settings and trailer brake pad wear
  • Tires: Ensure proper inflation on both tow vehicle and trailer
  • Suspension & Steering: Look for alignment issues, looseness, or wear
  • Parking Brake: Confirm it’s holding properly, especially on inclines
  • Engine Braking Systems: Verify operation for added downhill control

3. Downshift to Lower Gears

Let your engine help do the braking. Downshifting reduces reliance on the brakes and helps control speed on long downhill grades.

When to Downshift:

  • Long, sustained descents
  • Approaching curves or intersections
  • Anytime braking power needs to be supplemented

This technique minimizes brake fade and extends pad and rotor life.


4. Use Pulse Braking—Avoid Riding the Brakes

One of the most common (and dangerous) mistakes when descending is riding the brakes—a sure path to overheating and brake fade. Instead, use controlled “pulse braking.”

How to Apply Pulse Braking:

  1. Apply steady, firm brake pressure for a few seconds.
  2. Release to allow the brakes to cool.
  3. Repeat as needed to control speed.

This method gives brakes time to dissipate heat while maintaining control.


5. Balance Your Load Correctly

An unbalanced load increases brake strain and reduces vehicle stability—especially on downhill slopes.

Best Practices:

  • Maintain 10–15% tongue weight on trailers
  • Load heavier items toward the front of the trailer
  • Use tie-downs to prevent shifting during descent

A well-distributed load improves braking response and reduces sway.


6. Upgrade to DFC Heavy-Duty Brake Components

Standard brake systems often fall short under the demands of towing. DFC performance brake components are engineered specifically for heavy loads and extended use.

Recommended Towing Upgrades:

🛠️ Trusted by fleet operators and performance-focused shops alike, DFC braking solutions are built to withstand punishing conditions while maintaining safety and control.


7. Maintain a Safe Following Distance

Towing increases braking distance—sometimes dramatically. Maintain at least 5–6 seconds of space between your vehicle and the one ahead to allow for safe, gradual braking.


8. Use Trailer Brakes Effectively

Proper use of trailer brakes improves control and prevents trailer sway during descent.

Tips:

  • Adjust the gain setting on your electric brake controller
  • Test brake response before hitting a long grade
  • Manually activate trailer brakes to help reduce sway, if needed

9. Plan Routes and Avoid Dangerous Grades

Use GPS tools or trucker apps to map out routes that avoid excessive downgrades, especially when towing at or near capacity. When unavoidable, ensure your vehicle and brakes are ready for the challenge.


Final Thoughts

Braking downhill while towing requires the right equipment, technique, and preparation. From pre-trip checks to gear selection and load balancing, every step contributes to a safer, more controlled descent.

For maximum confidence on the road, equip your vehicle with DFC’s high-performance towing brake components—engineered for durability, temperature resistance, and stopping power you can count on.

Experience Superior Braking Performance from the First Stop

DFC Blog
Scorched to remove uncured bonding agents, minimizing the need for initial break-in period and increasing stopping power from the initial stop

Confidence Begins with the First Press of the Pedal

Whether you’re a daily commuter, fleet operator, or high-performance driver, you need reliable stopping power—right from the first stop. At Dynamic Friction Company (DFC), we ensure that confidence with every brake pad we produce.

A key part of that performance? Post-curing. This advanced manufacturing process delivers immediate stopping power, reduces break-in time, and guarantees friction stability under all driving conditions.


What is Post-Curing—and Why Does It Matter?

Post-curing is a heat treatment process applied to brake pads after molding. It fully cures the friction material by eliminating uncured bonding agents and stabilizing the pad’s composition.

Many competitors skip this step, relying on drivers to “bed-in” the pads during use—leaving initial performance compromised. At DFC, every brake pad is 100% post-cured so it’s ready to perform the moment it’s installed.


The DFC Post-Curing Advantage

Immediate Stopping Power

No long break-in periods. Our post-cured pads deliver confident, responsive braking from the first press—ideal for customers who demand immediate results.

Consistent Braking in Any Condition

Post-curing stabilizes the pad’s friction coefficient, ensuring uniform performance across a wide range of temperatures and conditions—from city traffic to highway emergencies.

Reduced Noise & Vibration

By eliminating volatile compounds during post-curing, we reduce the risk of noise, vibration, and harshness (NVH). Expect smoother, quieter stops—every time.

Longer Pad Life

Post-curing reduces uneven wear and prevents glazing, extending the lifespan of your pads and minimizing downtime for replacements.

Superior Thermal Stability

High heat from aggressive or frequent braking won’t compromise performance. DFC pads maintain their integrity and stopping power even under extreme thermal stress.


Scorched for Extra Performance

After post-curing, we go one step further: scorching. This additional treatment burns off residual gases and surface impurities, enhancing initial bite and further shortening break-in time. It’s an extra step that delivers extra performance—only from DFC.


Post-Cured Pads Across the DFC Lineup

All DFC brake pads are post-cured and engineered for precision. Here are just a few examples from our range:


Why Trust DFC for Your Braking Needs?

  • 100% Post-Cured for Instant Performance
  • Scorched for Optimal Break-In
  • Engineered to OEM Standards or Better
  • Backed by Industry-Leading Technical Support

Upgrade to DFC Brake Pads and Feel the Difference

Looking for brake pads that offer instant performance, longer life, and fewer comebacks? Choose DFC post-cured brake pads and give your customers the confidence they deserve—right from the first stop.

How to Reduce Noise and Vibration in Brake Installations with DFC Shims

DFC Blog

Achieve a Quieter, Smoother Ride with Premium Brake Shims

Brake noise and vibration can be frustrating for drivers and a challenge for mechanics. Whether it’s an annoying squeal, a grinding noise, or a pulsating pedal, these issues often stem from poor damping and vibration control. One of the most effective ways to reduce brake noise and vibration is by using high-quality shims—like DFC Premium Rubber-Steel-Rubber (RSR) Shims—designed to improve braking performance, enhance comfort, and extend the life of your braking system.

In this guide, we’ll explore how brake noise occurs, why shims are essential, and how DFC brake shims can help you achieve a smoother, quieter brake installation.


Why Do Brakes Make Noise?

Brake noise is typically caused by vibration and resonance between the brake pads, rotors, and calipers. Some of the most common causes include:

  • Improper brake pad fitment – Pads that don’t sit flush against the caliper can create movement and noise.
  • Worn or damaged brake components – Old rotors, uneven pad wear, and lack of lubrication can lead to squealing and grinding.
  • Inadequate damping materials – Poor-quality or missing shims can increase vibrations.
  • Environmental factors – Dust, moisture, and extreme temperatures can affect brake performance.

While proper installation and high-quality brake pads are crucial, brake shims play a vital role in noise reduction by absorbing vibrations and preventing metal-to-metal contact.


The Role of Brake Shims in Noise and Vibration Control

Brake shims act as a buffer between the brake pad and caliper, helping to reduce vibrations and noise. High-quality shims absorb energy and dampen sound waves that would otherwise create unwanted brake noise.

DFC Premium Rubber-Steel-Rubber (RSR) Shims are specifically engineered to:

Reduce Noise & Vibration – Multi-layered construction absorbs sound and minimizes movement.
Improve Brake Performance – Maintains consistent contact between the pad and rotor for smooth braking.
Enhance Durability – Designed to withstand extreme temperatures and prolonged use.
Optimize Comfort – Delivers a quieter, smoother ride for drivers.


How DFC Brake Shims Provide Superior Noise Reduction

Not all brake shims are created equal. DFC’s Premium RSR Shims stand out due to their advanced three-layer construction, which ensures optimal vibration damping and noise suppression.

1. Rubber-Steel-Rubber (RSR) Construction

DFC shims are designed with a rubber-steel-rubber structure, providing superior damping properties. The rubber layers absorb vibrations, while the steel core maintains structural integrity, ensuring long-lasting performance.

2. OEM Fit & Functionality

DFC shims are precision-engineered to match or exceed OEM standards, ensuring a perfect fit and seamless installation. This guarantees consistent performance across a wide range of vehicle applications.

3. Thermal & Corrosion Resistance

Brake components experience extreme temperatures, moisture, and debris. DFC shims are thermally resistant to withstand high heat levels and corrosion-resistant for extended durability.

4. Improved NVH (Noise, Vibration, and Harshness) Characteristics

By minimizing unwanted brake vibrations and harmonics, DFC brake shims significantly enhance NVH performance, resulting in a quieter, more comfortable driving experience.


Best Practices for Installing Brake Shims

To maximize the benefits of DFC shims and ensure a noise-free brake installation, follow these expert tips:

Clean the Caliper Bracket & Hardware – Remove old brake debris and rust before installing new shims.
Apply Lubrication Sparingly – Use high-quality brake lubricant on contact points but avoid over-application.
Ensure Proper Pad Alignment – Make sure brake pads are seated correctly against the shims and caliper.
Check for Worn or Warped Rotors – If the rotors are uneven or excessively worn, replace them for optimal braking.
Use High-Quality Brake Pads – Pairing DFC shims with DFC brake pads ensures the best noise and vibration control.


Upgrade Your Braking System with DFC Shims Today

If you’re experiencing brake noise and vibration, upgrading to DFC Premium Rubber-Steel-Rubber Shims is a simple yet effective solution. Their advanced three-layer design, OEM precision fit, and superior noise-damping properties make them an essential upgrade for any brake installation.

For a quieter, smoother, and more reliable braking experience, choose DFC brake shims—the industry leader in brake noise reduction technology.