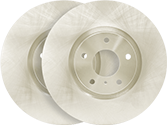
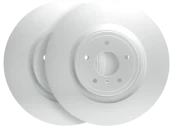
The 2025 Nissan Murano combines bold design with everyday comfort, giving drivers a refined experience on the road. And when it comes to braking, performance and reliability are key. That is why this week’s Must-Have Monday highlight is the DFC 5000 Brake Kit with GeoSpec Rotors, built to deliver OE-level precision, smooth stops, and long-lasting durability.
Why the DFC 5000 Brake Kit is the Right Choice
Dynamic Friction Company engineers every braking solution to meet or exceed OEM standards. For the 2025 Nissan Murano, our DFC 5000 Series brake pads and GeoSpec Rotors work together to provide the performance, consistency, and dependability that drivers need.
Kit Highlights
OEM-level fit and feel for seamless installation and factory-like performance
Rust-resistant GeoSpec coating for long-lasting protection against corrosion
Mill-balanced rotors designed for smooth, vibration-free braking
Low-dust, quiet ceramic pads that reduce noise and keep wheels cleaner
All-in-one convenience with pads, rotors, and hardware included in one complete kit
Performance You Can Count On
Whether your customers are commuting, taking a family road trip, or simply enjoying the open highway, the DFC 5000 Brake Kit with GeoSpec Rotors delivers reliable stopping power in every condition. For shops and distributors, these all-in-one kits save time on the shelf and in the bay, with each component precision-engineered for fit, performance, and long-term reliability.
As one of the first aftermarket brake manufacturers to release a complete solution for the 2025 Nissan Murano, DFC helps technicians, shop owners, and distributors stay ahead of the market with premium parts supported by top-tier fill rates and service.
Upgrade the 2025 Nissan Murano with DFC
Replace factory brakes with proven performance. The DFC 5000 Brake Kit with GeoSpec Rotors gives you and your customers confidence with every stop.
Visit dynamicfriction.com or connect with your local DFC sales representative to download the full application sheet organized by make and model.
When it comes to modern SUVs, braking performance is just as important as power and comfort. That’s why DFC now offers a complete line of high-performance brake parts for the 2023 and 2025 Honda Pilot. Designed for vehicles equipped with advanced safety and performance systems, these components meet original equipment standards and serve as direct replacements for factory-installed parts.
Engineered for the Versatile SUV Driver
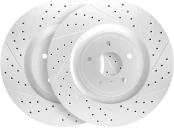
The Honda Pilot is built for drivers who expect confidence on every road, from daily commutes to off-road adventures. With features like advanced brake force distribution and hill descent control, it demands replacement parts that match OEM performance. That’s where the DFC 5000 Advanced Series Brake Pads and GeoSpec Coated Rotors deliver.
Manufactured using positive mold technology, these brake pads ensure consistent performance and quality. Built to original equipment specifications with enhanced thermal stability and reliable bite, this combination results in:
Consistent pedal feel
Resistance to brake fade
Longer rotor life with pad-friendly formulations
Each component is matched to the specific demands of the Honda Pilot’s braking system. Friction materials and hardware are selected to deliver both performance and safety. Components are also tailored per axle to maintain balance and control during braking.
Complete Brake Solution for Honda Pilot
DFC is among the first aftermarket suppliers to offer a complete braking solution for the 2023 and 2025 Honda Pilot. Available parts include:
Rear brake pad and rotor options are also available to ensure complete axle coverage. All components are stocked and ready for immediate installation, helping distributors and shops minimize downtime.
Each part is tested for exact fitment, long-term durability, and consistent performance. DFC components meet or exceed industry standards for safety and reliability.
For added convenience, these parts are also available in all-in-one brake kits, which reduce inventory clutter and save time during installation.
Confirmed Vehicle Compatibility
DFC brake parts are engineered to integrate seamlessly with the Pilot’s advanced safety and driver assistance systems. Correct fitment and the proper friction profile are critical for maintaining braking performance and control.
Our brake pads are developed to deliver reduced noise, low vibration, and extended pad life. The result is a smoother, quieter ride and confident stopping in every driving condition.
Upgrading the brakes on your Pilot is about more than just replacing worn components. It’s about choosing parts that protect passengers, preserve vehicle value, and provide lasting performance. DFC parts help drivers get the most from every mile and give the Pilot the braking capability it was built to handle.
Ready to Ship
DFC leads the market with fast catalog expansion and strong partner support. We maintain high fill rates and responsive customer service so you can stay ahead of demand. Whether managing warehouse inventory or working in the shop, our Honda Pilot brake parts are ready when you are.
We also value customer feedback. Ordering through DFC is secure, and we encourage customers to share their experiences after installation.
How to Order
If you missed this week’s Must Have Monday announcement, connect with your DFC sales rep or visit dynamicfriction.com to download the full application sheet. It is organized by make and model for easy reference and includes the latest Honda Pilot coverage. When ordering brake kits, always confirm wheel fitment if aftermarket wheels are installed.
Be sure to check back every Monday for new product launches and expanded coverage from the DFC team.
When you’re pushing heavy loads at speed, braking power becomes just as important as horsepower. That’s why DFC now offers a complete line of high-performance brake parts for the 2024 and 2025 Chevy Tahoe RST. Designed for modern vehicles equipped with advanced safety and performance systems, these components meet original equipment standards and serve as direct replacements for factory-installed parts.
Engineered for the Performance SUV Driver
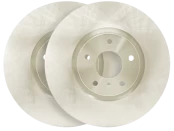
The Chevy Tahoe RST is built for drivers who demand more from their SUV, whether towing, cruising, or taking sharp corners with confidence. Braking performance is critical to that experience. That’s where the DFC 5000 Advanced Series Brake Pads and GeoSpec Coated Rotors come in.
Manufactured using positive mold technology, these brake pads ensure consistent performance and quality. The pads and rotors are built to original equipment specifications with enhanced thermal stability and reliable bite. This results in:
Consistent pedal feel
Resistance to brake fade
Longer rotor life with pad-friendly formulations
Each component is matched to the specific demands of the Tahoe RST’s braking system. Friction materials and hardware are selected to meet the needs of both performance and safety. Components are also tailored per axle to maintain balance and control during braking.
Complete Brake Solution for Chevy Tahoe RST
DFC is one of the first aftermarket suppliers to offer a complete braking solution for the 2024 and 2025 Tahoe RST. Available parts include:
Rear brake pad and rotor options are also available to ensure full axle coverage. All components are stocked and ready for immediate installation, minimizing downtime for both distributors and shops.
Each part is tested for exact fitment, long-term durability, and consistent performance. DFC components meet or exceed industry standards for safety and reliability.
For added convenience, these parts are available in all-in-one brake kits. These kits help reduce inventory clutter and save time during the installation process.
Confirmed Vehicle Compatibility
DFC brake parts are engineered to integrate seamlessly with the Tahoe’s advanced safety and driver assistance systems. Proper fitment and the correct friction profile are critical for maintaining performance and control.
Our brake pads are developed to deliver reduced noise, low vibration, and extended pad life. The result is a smoother, quieter ride and confident stopping in every driving condition.
Upgrading the brakes on your Tahoe is about more than just replacing worn parts. It’s about choosing components that protect passengers, preserve vehicle value, and provide lasting performance. DFC parts help you get the most from every mile and give your Tahoe the braking capability it was built to handle.
Ready to Ship
DFC continues to lead the market by offering fast catalog expansion and excellent partner support. We maintain high fill rates and responsive customer service to help you stay ahead of demand. Whether you are managing warehouse stock or turning wrenches in the shop, our Tahoe RST parts are ready when you are.
We also take customer trust seriously. Ordering through DFC is secure, and we encourage customers to leave reviews of their experience after installation.
How to Order
If you missed this week’s Must Have Monday announcement, connect with your DFC sales rep or visit dynamicfriction.com to download the full application sheet. It is organized by make and model for easy reference and includes the latest Tahoe RST coverage. When ordering brake kits, always confirm wheel fitment if aftermarket wheels are installed.
Be sure to check back every Monday for new product launches and expanded coverage from the DFC team.
Maximize Every Brake Job with Purposeful, Value-Driven Upsells
Every brake service is more than just a chance to replace worn parts—it’s an opportunity to enhance vehicle safety, improve performance, and increase shop revenue. The key is offering relevant, trusted recommendations based on the customer’s driving habits, inspection findings, and long-term vehicle needs.
Here are the top brake service upsells that deliver real benefits for your customers—and measurable gains for your shop.
1. Complete Brake Kits (Pads + Rotors + Hardware)
Rather than replacing pads or rotors individually, upsell a matched brake kit for consistent performance and easier installation.
Customer Benefits:
Matched components improve fitment and brake feel
Reduced noise and more even wear
Long-term savings with fewer future service needs
Shop Benefits:
Higher average repair order (ARO)
Fewer comebacks due to part mismatches
Time savings with pre-packed kits
DFC offers OE-quality brake kits engineered for reliability, performance, and smooth installations.
2. Caliper Service or Replacement
Calipers play a critical role in braking efficiency. Issues like seized slide pins or uneven piston movement lead to drag, pull, and premature wear.
Upsell When You Spot:
Heat discoloration or sticking pistons
Uneven pad wear across the axle
Boot damage or corrosion
Recommend caliper cleaning, lubrication, or replacement as part of a full-service solution.
3. Brake Fluid Exchange
Brake fluid absorbs moisture over time, compromising hydraulic pressure and responsiveness.
Recommend a Fluid Exchange If:
It’s been 2+ years or 24,000+ miles
Fluid appears dark or contaminated
The customer is upgrading to performance components
Benefits:
Improved pedal feel and braking consistency
Longer lifespan for calipers, valves, and ABS systems
For customers who tow, commute heavily, or prefer sportier handling, performance upgrades are a powerful, high-value upsell.
Key Performance Enhancements:
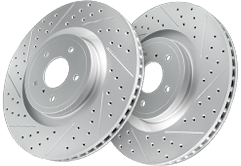
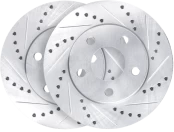
Scorched pads for better bite and fade resistance
Slotted or drilled rotors for improved heat dissipation
High-torque, low-dust friction materials for daily or spirited driving
DFC offers application-specific upgrades that are easy to match to vehicle use cases—giving drivers better stopping power and shops a high-trust upsell opportunity.
Old hardware leads to brake noise, misalignment, and uneven wear. Including fresh hardware with every brake job ensures a complete, long-lasting service.
Why It Matters:
Prevents pad drag and rattle
Improves caliper and pad alignment
Low-cost, high-impact add-on for every brake service
Best Practice: Make hardware kits standard with every pad or rotor replacement.
6. Full Brake System Inspection
Offering a comprehensive brake inspection builds credibility and identifies additional service opportunities.
Include Checks For:
Booster and master cylinder condition
Brake hoses and lines for cracks or leaks
Pedal response and fluid level analysis
ABS warning lights or system faults
A full inspection demonstrates your commitment to safety while uncovering upsell potential based on real issues.
Educate Customers on Stock vs. Upgrade Options
Factory stock components meet basic performance standards—but for customers with specific driving needs, upgrades make a difference.
Benefits of Upgraded Brakes:
Shorter stopping distances
Greater fade resistance under load
Improved safety and peace of mind
Position performance products as a way to match the brake system to the driver’s demands.
Upsell with Integrity: Build Trust, Not Pressure
Successful upsells:
Solve specific problems (noise, pulling, wear)
Extend part life and reduce future repairs
Match the customer’s driving style and goals
Use clear visuals and inspection results to explain the “why”
When recommendations are based on need—not sales goals—customers trust your expertise and return for future services.
Final Thoughts: Better Braking Builds Better Business
Effective brake upsells are about adding value. When your shop focuses on enhancing safety, performance, and longevity, customers leave satisfied—and your shop benefits from higher revenue and fewer comebacks.
Dynamic Friction Company supports these goals with premium pads, rotors, kits, hardware, and performance solutions—engineered for OE fit, installer efficiency, and customer confidence.
Quality brake components are essential not just for vehicle performance—but for driver and passenger safety. From brake pads to rotors, each part of the braking system plays a critical role in ensuring responsive, reliable stopping power under all driving conditions.
Dynamic Friction Company (DFC) stands at the forefront of the automotive aftermarket, delivering premium brake components that consistently meet—and often exceed—Original Equipment Manufacturer (OEM) standards.
Why High-Quality Brake Components Matter
Safety Reliable brake components are fundamental to vehicle safety. They deliver consistent stopping power, reduce braking distances, and help prevent accidents.
Performance Precision-engineered brake parts provide smoother, more responsive braking. This improves vehicle handling and enhances driver confidence in daily driving and high-demand scenarios.
Durability High-quality materials and manufacturing processes extend the life of brake pads, rotors, and hardware—reducing maintenance costs and increasing long-term value.
DFC’s Commitment to Engineering Excellence
Founded on the principles of quality, innovation, and value, DFC offers a comprehensive range of braking solutions for both foreign and domestic applications. Every product is designed with performance, reliability, and technician ease-of-use in mind.
Brake Pads Available in multiple friction formulations, DFC brake pads are designed to meet the specific needs of various vehicle platforms. Each formulation balances stopping power, low noise, and minimal dust.
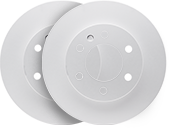
Brake Rotors Made with premium G3000/G11H18 iron castings, DFC rotors are engineered for strength, thermal stability, and long-lasting durability—ensuring consistent braking performance mile after mile.
Brake Kits DFC’s complete brake kits pair premium pads and rotors for a turn-key solution that simplifies installation and maximizes performance.
Innovation That Delivers Real-World Benefits
DFC is driven by continuous improvement and innovation. Their investment in R&D ensures the introduction of cutting-edge technologies that enhance safety and simplify installation.
GeoSpec® Coated Rotors DFC’s exclusive GeoSpec® fully coated rotors provide superior corrosion resistance and arrive ready to install—no pre-cleaning required. This improves efficiency in the shop and delivers long-term protection against rust and wear.
Conclusion: Trust in Every Stop
Investing in high-quality brake components is more than a smart choice—it’s a safety imperative. With Dynamic Friction Company, you’re choosing a brand trusted by professional technicians, performance drivers, and fleet operators across the industry.
From advanced materials to OE-level precision, DFC’s brake products are engineered for reliability, performance, and peace of mind. When safety matters most, trust the company that builds with purpose—trust DFC.
The rise of electric cars and electric vehicles (EVs) is reshaping the automotive industry, and braking systems are no exception. Traditional friction-based brakes are giving way to innovative designs, improving efficiency, longevity, and performance. Mechanics and auto industry professionals must understand these advancements to stay ahead of the curve.
1. Introduction to Electric Vehicle Braking Systems
Electric vehicle braking systems are designed to provide safe and efficient stopping power while also recovering kinetic energy and converting it into electrical energy. These systems are a crucial component of electric vehicles, as they enable the recovery of energy that would otherwise be lost as heat during braking. Electric vehicle braking systems typically consist of a combination of regenerative braking and traditional friction braking. Regenerative braking uses the electric motor to capture kinetic energy and convert it into electrical energy, which is then stored in the vehicle’s battery. Traditional friction braking uses brake pads and rotors to slow the vehicle down. The combination of these two braking systems allows electric vehicles to achieve improved energy efficiency and reduced wear on brake components.
Regenerative Braking: A Game Changer in Kinetic Energy Recovery
One of the biggest changes in electric vehicle brake design is regenerative braking. Unlike conventional brakes, the brake system in electric vehicles incorporates regen braking to slow the vehicle by converting kinetic energy into electricity, which is then stored in the battery.
Benefits of Regenerative Braking:
✔ Reduces brake wear by minimizing friction brake usage through the regenerative braking system ✔ Improves energy efficiency and extends driving range ✔ Enhances vehicle control through smoother deceleration
What This Means for Mechanics:
🔧 Unlike traditional brake pads, EV brake pads and rotors last significantly longer, requiring fewer replacements.
🔧 Less wear means fewer brake dust emissions, making EVs more environmentally friendly.
🔧 Shops must adapt maintenance strategies, focusing on brake lubrication and caliper service instead of frequent pad replacements.
3. Types of Brakes Used in Electric Vehicles
Electric vehicles use a variety of brake types, including regenerative brakes, friction brakes, and electrohydraulic brakes. Regenerative brakes are the primary braking system used in electric vehicles, as they capture kinetic energy and convert it into electrical energy. Friction brakes are used in conjunction with regenerative brakes to provide additional stopping power when needed. Electrohydraulic brakes are used in some electric vehicles to provide a balance between regenerative and friction braking. These brakes use an electric motor to control the hydraulic system that applies pressure to the brake pads.
2. Lighter Brake Components for Efficiency
Since EVs are heavier than gas-powered cars due to large battery packs, manufacturers are turning to lighter brake materials like metallic brake pads, which are known for their superior heat dissipation and suitability for high-performance driving, to improve efficiency.
New Innovations in EV Brake Materials:
🚗 Carbon-ceramic rotors – Lighter and more durable than traditional cast iron 🚗 Aluminum brake calipers – Reduce weight while maintaining strength 🚗 Advanced coatings – Protect brake surfaces from rust due to infrequent use
Why This Matters: Lighter materials reduce unsprung weight, leading to better handling and longer range. Additionally, these innovations enhance the conversion of kinetic energy into mechanical energy during regenerative braking, improving overall energy efficiency.
3. Shift Towards Rear Drum Brakes in EVs
Surprisingly, some EV manufacturers (such Volkswagen) are reintroducing rear drum brakes as part of their brake systems. While drum brakes were largely phased out in favor of disc brakes, EVs are bringing them back for efficiency.
Why Some EVs Use Rear Drum Brakes:
✔ Less brake dust – Drums are enclosed, reducing emissions ✔ Lower maintenance – Less exposure to debris and moisture ✔ Better for regenerative braking – Vehicle manufacturers are focusing on the efficiency of regenerative braking systems to enhance energy recovery from braking in hybrid and electric vehicles. Drums complement regen braking systems
The Impact of Reduced Brake Use on Brake Pads Maintenance
Because the brake pedal in EVs is used less frequently, mechanics must rethink traditional maintenance schedules. The biggest challenges include:
🛠 Corrosion and rust buildup – Less frequent use means moisture can accumulate on rotors. 🛠 Seized calipers – Without regular actuation, caliper pistons can stick. 🛠 Brake fluid contamination – EVs still require periodic fluid changes to maintain hydraulic system integrity.
Best Practices for EV Brake Maintenance:
✅ Perform regular inspections to check for rust buildup and ensure optimal recovery of initial kinetic energy during braking events.
✅ Use coated rotors like DFC GeoSpec Coated Brake Rotors to resist corrosion.
✅ Lubricate caliper slides to prevent sticking.
7. Electric Vehicle Braking Systems and Energy Efficiency
Electric vehicle braking systems are designed to provide improved energy efficiency by recovering kinetic energy and converting it into electrical energy. Regenerative braking is a key component of electric vehicle braking systems, as it captures kinetic energy and converts it into electrical energy. This energy is then stored in the vehicle’s battery and can be used to power the vehicle’s electrical systems. Electric vehicle braking systems can achieve energy efficiency of up to 70% or more, depending on the vehicle and driving conditions. This is significantly higher than traditional friction braking systems, which typically achieve energy efficiency of around 10-20%. The improved energy efficiency of electric vehicle braking systems can lead to increased driving range and reduced energy consumption.
5. The Future of Brake-by-Wire Technology
EVs are pushing the industry toward brake-by-wire systems, which replace traditional hydraulic systems with electronic controls and leverage electric motors for regenerative braking. This technology offers:
🔹 Faster response times for improved safety 🔹 Adjustable braking feel to optimize performance 🔹 Reduced weight and complexity compared to hydraulic systems
Some EVs, like the Tesla Model S Plaid, are already experimenting with fully electronic braking systems.
Final Thoughts
Electric vehicle brake design, compared to traditional brakes, is evolving rapidly, reducing maintenance needs, increasing efficiency, and introducing new materials. As EV adoption grows, mechanics and parts distributors must stay informed on these changes.
For brake parts designed for modern vehicles, check out DFC’s high-performance brake solutions—engineered for durability, efficiency, and cutting-edge braking technology.
Sports cars are engineered for power, agility, and speed. But none of that matters without control. Whether you’re carving corners on the track or pushing the limits on the open road, your vehicle’s braking system plays a critical role in your safety and performance.
That’s where performance brake pads come in.
Upgrading to high-performance brake pads is essential for delivering consistent stopping power, enhanced pedal feel, and heat resistance under extreme driving conditions. Advanced brake systems—built from carbon-ceramic or high-carbon alloys—ensure that your sports car not only accelerates like a champion but stops like one too.
Why Brake Upgrades Matter for Sports Cars
Brake upgrades are one of the most important performance modifications a sports car owner can make. For those who demand more than stock performance, upgraded components enhance:
Stopping Power
Heat Dissipation
Fade Resistance
Driver Confidence
Whether for street performance or track days, upgrading to precision-engineered brake pads, rotors, and calipers ensures your vehicle is ready for whatever the road throws at it.
How Performance Brake Pads Outclass Stock Pads
Everyday brake pads are designed for commuter cars, not high-performance machines. Here’s how performance brake pads are built differently:
Higher Friction Coefficients – For rapid, responsive braking at high speeds.
Superior Heat Resistance – Designed to combat brake fade during repeated hard stops.
Extended Durability – Engineered to withstand the rigors of aggressive driving.
Refined Pedal Feel – Delivers confidence-inspiring control with every press.
Brake System Components: A Holistic Upgrade
A performance pad alone can’t do all the work. For optimal braking, every component matters:
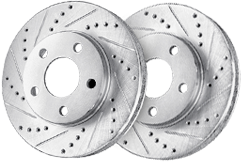
Rotors – High-carbon or slotted rotors increase heat dissipation and resist warping.
When every second counts, stock just doesn’t cut it.
What Is Brake Fade—and How Do You Prevent It?
Brake fade occurs when your pads and rotors overheat, reducing braking power and increasing stopping distances. It’s a common issue in performance driving, but preventable with:
High-performance pads and rotors
Smooth, controlled braking techniques
Routine maintenance and component checks
By choosing premium brake materials, you significantly reduce the risk of fade under load.
Selecting the Right DFC Performance Brake Pads
Choosing the appropriate brake pads is crucial for optimal performance and safety. Here’s a breakdown of DFC’s premium brake pad lines to help you make an informed decision:
Best For: Commercial vehicles and situations requiring frequent stopping or operation under harsh conditions.
Benefits: Superior braking performance, extended pad life, and resistance to extreme heat.
Why It Matters: Provides dependable stopping power and durability for vehicles subjected to rigorous use.
Need assistance selecting the right brake pads for your vehicle? Visit our Brake Pads Product Page to explore our full range and find the perfect fit for your driving needs. For personalized support, don’t hesitate to reach out through our Contact Us page—our team is here to help you maintain OEM safety and performance standards with confidence.
Installation and Maintenance: Get the Most from DFC
Even the best-engineered brake pads—like those from DFC—require proper installation and routine maintenance to perform at their peak.
To ensure optimal braking performance:
🔄 Replace worn or damaged parts promptly to preserve safety and performance.
🛠️ Always follow DFC’s installation guidelines included with our products.
✔️ Use only premium components, such as DFC rotors and hardware, to maintain system integrity.
🔍 Inspect pads and rotors regularly for wear, glazing, or uneven contact.
Why Choose DFC Performance Brake Pads?
At Dynamic Friction Company (DFC), we design brake pads that exceed expectations in every performance category. Whether you’re upgrading for high-speed street driving or track day domination, DFC pads deliver precision, control, and safety.
What Sets DFC Apart:
✔️ Advanced Friction Formulas for consistent stopping ✔️ Scorched & Post-Cured Pads for optimal break-in ✔️ Low Dust & Quiet Operation for daily comfort ✔️ Heat-Resistant Materials to combat brake fade
Our performance brake pads are trusted by technicians, shop owners, and distributors nationwide—because we don’t just meet OE standards. We outperform them.
Final Thoughts
For sports car enthusiasts, performance brake pads are more than a luxury—they’re a necessity. The right braking system enhances control, preserves safety, and maximizes your driving experience.
Don’t let stock brakes hold you back. Upgrade to DFC Performance Brake Pads today and feel the difference.
Look, we’ve all made mistakes. Maybe you thought cargo shorts were a good look. Maybe you once said, “I don’t need the instructions.” Maybe you’ve installed remanufactured brake calipers, thinking you were saving a few bucks.
We’re not here to judge. We’re here to help.
In Episode 2 of Automotive Anonymous, we confront one of the biggest myths in the auto world: 💰 Are remanufactured calipers actually cheaper? 🚨 Do they really belong on your customers’ cars? 🎶 And can a support group meeting really turn into a musical?
Spoiler alert—new calipers win every time. And yes, there’s a song about it.
Why Reman Calipers Are Like a Bad Ex
Reman calipers show up looking like a deal, promising you savings and reliability—but before long, they’re calling you back… for a warranty claim.
🚨 They’ve got a history. Who knows how many vehicles (or potholes) they’ve been through? ⚠️ They’re inconsistent. Some work, some fail—but by the time you find out, your reputation is on the line. 💸 They cost more than you think. Between core charges, return hassles, and comebacks, where’s the savings? 🔧 They make you do the job twice. If that “cheaper” caliper fails, guess who’s doing free labor on the redo?
Your time is too valuable for this. And your customers? They expect better than recycled braking components with a mystery past.
Brand-New Calipers: The Upgrade You Deserve
When you finally break free from reman, here’s what you get with a brand-new caliper:
✔ New castings – No wear, no stress fractures, no “oops, hope it holds” moments. ✔ Fresh pistons – Strong, consistent, and ready to stop when you need them to. ✔ New dust boots, slide pins, bolts, and bleeders – Because every component should be new, not just some of them.
No guessing. No sketchy rebuilds. Just quality that keeps your shop running smoothly and your customers coming back for the right reasons.
Break the Cycle—One Step at a Time
If you’re still ordering reman calipers, this is your wake-up call. We know it’s tough, but we believe in you.
Episode 2 of Automotive Anonymous is here to help you break free—and it even includes a musical number to make it stick. 🎶
So, what’s it gonna be?
🚗 A never-ending cycle of reman core charges and comebacks? ✅ Or new calipers, better braking, and no regrets?
Watch the episode. Sing along. And take the next step toward a better way.
Welcome to Automotive Anonymous, where we help installers, mechanics, and automotive professionals break free from the burdens of remanufactured calipers—one step at a time. In the automotive industry, best practices and standards are crucial for ensuring customer satisfaction and avoiding complaints. If you’ve ever found yourself frustrated with remanufactured electric parking brake (EPB) calipers, you’re not alone. Using quality parts in brake jobs is essential to meet industry standards and achieve lasting repairs.
Step One: Admitting There’s a Problem
It starts with a simple question: “Oh yeah? Then what am I supposed to do about the electric parking brake calipers?”
That’s a tough one. EPB calipers aren’t like traditional calipers. They have electronic components that demand reliability, precision, and—most importantly—functionality within the brake system. Proper inspection and installation are crucial to ensure optimal performance and prevent issues such as noise, vibration, or failure. But if you’re reaching for a remanufactured unit, you might already be setting yourself up for failure.
Let’s take a deep breath. It’s okay. We’re here to talk through this.
Understanding Electric Parking Brake Systems
Why Reman Electric Parking Brake Calipers Are a Risky Habit
We’ve all been there. You get a remanufactured EPB caliper, install it, and hope for the best. But before long:
🔧 Higher Failure Rates – Remanufactured EPB calipers have a reputation. And not the good kind. The electronics inside? Not always tested properly. The motor? Questionable at best. And that means one thing—comebacks. Additionally, issues with the caliper piston not moving freely during inspections can lead to brake noises and performance problems.
🔩 Inlet Threads That Are Always Messed Up – You go to attach the brake hose, and suddenly, you’re dealing with stripped or cross-threaded inlets. Do you really have time to chase down an adapter or—worse—rethread it? That’s precious shop time wasted. The process is time consuming and adds significant time to the overall job.
🔁 The Never-Ending Cycle of Core Returns – Send in the old unit, wait for the credit, hope the reman process worked, and then… do it all over again next time. It’s like being stuck in a bad relationship—you know you deserve better, but you keep going back.
🔍 Rotor Inspections – It’s crucial to inspect the rotor for conditions such as lateral runout and thickness variation. These issues can lead to performance problems like pedal pulsation and excessive brake noise. Proper installation and machining are essential to ensure optimal brake function.
Breaking the Cycle: The Automotive Anonymous Motto
This is where we remind ourselves of the truth. Say it with us now:
💬 Never Demand a Remand.
New EPB calipers give you the peace of mind that your install is solid, your customer is happy, and your work won’t come back to haunt you. A thorough brake job ensures that the electronic motor will function correctly and the caliper won’t seize up again in a few months. Using high-quality new pads along with new calipers is crucial to ensure optimal performance and prevent issues like noise and vibration.
The First Step to Recovery: Understanding Remanufactured Components
You’re here because you’re ready to make a change. It won’t always be easy—old habits die hard. But every journey starts with a single step, and today, that step is recognizing that new calipers mean fewer headaches, fewer comebacks, and more time for the jobs that actually pay. New calipers also ensure better performance and safety for your vehicle.
So next time someone asks, “What am I supposed to do about electric parking brake calipers?”—you’ll know the answer. Remember, professional repair is crucial to ensure the functionality of the brake system and avoid future problems.
✔️ Step away from the reman.✔️ Invest in new.✔️ Stay strong. We’re here to help.
Join the Movement in the Automotive Industry
Have a story about breaking free from remanufactured EPB calipers? We’d love to hear it. Share your experience, spread the word, and remember: Recovery starts today. Remanufactured brake calipers are suitable for various makes, including European, Japanese, and Korean vehicles. Proper maintenance is crucial as brake issues can significantly impact your car’s performance and lead to customer complaints.
When it comes to brake calipers, many shops and distributors have relied on remanufactured units in the past due to perceived cost savings. However, hidden inefficiencies, quality issues, and durability concerns often turn those savings into higher long-term expenses. WithDFC’sall-new brake calipers, you get consistent quality, reduced failure rates, and competitive pricing—without the headaches.
DFC’s new calipers meet or exceed OEM performance standards, ensuring quality and reliability.
Remanufactured calipers require core exchanges, which can add both complexity and unexpected costs. Core returns may not meet acceptance criteria due to issues like corrosion or damage, leading to rejections and extra charges.
With DFC calipers, core exchanges are a thing of the past. Our calipers are all-new, eliminating return hassles and ensuring a smoother purchasing and installation process. Additionally, DFC calipers come with all necessary installation hardware, ensuring easy installation.
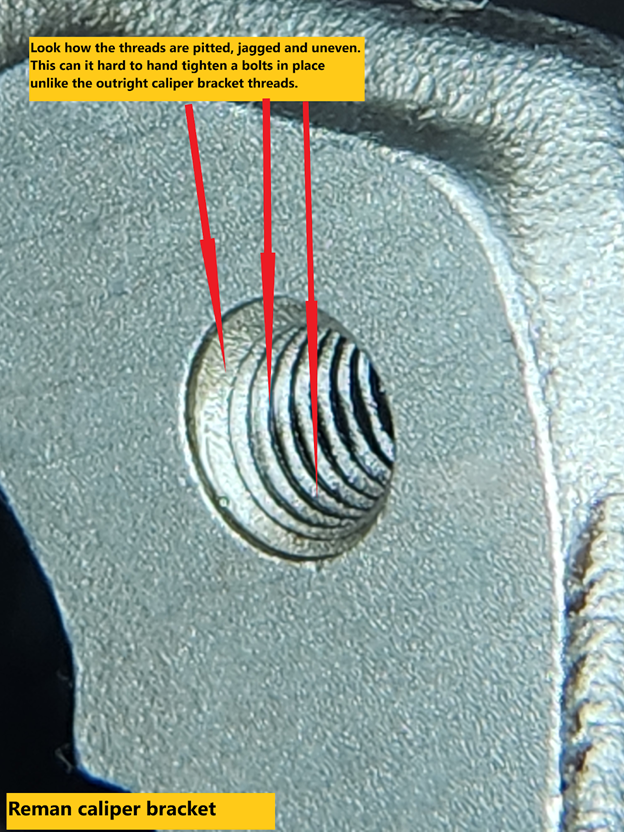
2. Caliper Port Inlet Thread Issues
Poorly remanufactured calipers often have pitted, jagged, or uneven threads in the caliper port inlet. This makes hand-tightening difficult, causing leaks and installation delays.
DFC calipers feature precision-machined port threads, ensuring smooth, secure installation without added frustration. This saves valuable time for technicians and prevents potential performance issues caused by improper threading.
3. Challenges with Modern Brake Technology
Electric Parking Brake (EPB) Calipers
EPB calipers integrate the parking brake electronically, eliminating the need for mechanical levers. However, remanufacturing these units is particularly challenging. The complex assembly requires specialized equipment to meet OEM standards, and many remanufactured units suffer from high failure rates due to improper testing and assembly.
By contrast, DFC’s new EPB calipers are built entirely with new components, ensuring reliable operation and long-term durability. Each unit undergoes advanced testing to meet or exceed OEM specifications.
Mechanical Integral Parking Brake Calipers
Similar to EPB calipers, mechanical integral parking brake units require precise assembly to function correctly. Remanufactured versions often fail due to poor quality control, leading to brake performance issues and costly returns.
With DFC, precision-built calipers provide optimal performance and help shops avoid these risks.
4. Corrosion and Surface Damage in Aluminum Calipers
Modern vehicles increasingly use lightweight aluminum calipers, which present unique challenges for remanufacturers. Many rebuilders use abrasive steel-shot cleaning media, which can distort critical surfaces like guide pin bores and brake pad contact points. Aluminum calipers also corrode faster in harsh environments, making them less viable for remanufacturing.
DFC calipers are coated with a premium silver zinc finish to resist corrosion, ensuring long-lasting performance. This protective coating is applied to all our calipers, reducing the risk of surface damage and ensuring smooth, consistent operation. Proper installation of the caliper bracket is crucial to prevent surface damage and ensure the longevity of the caliper.
5. Guide Pin and Seal Integrity
Guide pins and seals play a crucial role in brake performance, but remanufacturing processes often compromise these components. Guide pin bores can become oval-shaped over time, especially in high-mileage calipers. Additionally, some rebuilders blast and tumble caliper bodies with guide pins still attached, causing bent pins and stripped protective coatings. Maintaining the integrity of guide pins and seals is crucial for preventing brake fluid leaks and ensuring optimal brake performance.
DFC calipers come with all-new guide pins, seals, and pin bushings. Our components are engineered to maintain proper alignment and retraction, preventing excessive brake pad contact with the rotor. This reduces wear, minimizes disc thickness variation (DTV), and ensures efficient braking performance.
Proper Brake Caliper Installation is Crucial
The Dangers of Upside-Down Brake Caliper Installation
Installing a brake caliper upside down is a common mistake that can have serious consequences for your vehicle’s braking system. When a caliper is installed upside down, the bleeder valve is positioned at the bottom, making it impossible to properly bleed air from the brake lines. This can lead to air pockets remaining in the system, resulting in reduced braking performance, spongy brake pedal feel, and increased risk of accidents.
In addition to reduced braking performance, an upside-down brake caliper installation can also lead to premature wear on the brake pads and caliper pistons. This can result in increased maintenance costs and reduced stopping power, making it essential to correct the issue as soon as possible. Ensuring the caliper is installed correctly from the start can save time, money, and most importantly, enhance the safety of your vehicle.
The Role of Brake Calipers in Overall Brake Performance
Brake calipers play a critical role in overall brake performance, working together with the brake pads and pistons to slow or stop your vehicle. A brake caliper is responsible for housing the brake pads and pistons, which apply pressure to the brake rotor to slow or stop the vehicle.
When a brake caliper is installed correctly, it can provide optimal braking performance, including improved stopping power, reduced brake fade, and increased safety. However, when a caliper is installed incorrectly, it can lead to reduced braking performance, uneven brake pad wear, and increased risk of accidents. Properly functioning calipers ensure that the braking system operates efficiently, providing the necessary stopping power to keep you and your passengers safe on the road.
Why Choose DFC Newly Manufactured Calipers?
With a catalog of nearly 3,000 SKUs, DFC offers the largest selection of new brake calipers in the industry. Our calipers are designed to address the challenges posed by remanufactured units, including:
No core returns or hidden charges.
Precision-machined components for easier installation.
Corrosion-resistant coatings for durability.
Compatibility with modern technologies like EPB and integral parking brakes.
Additionally, we’ve recently reduced prices by 10.94%, making our calipers more cost-effective than ever. Shops can now enjoy the benefits of new calipers at prices that compete with remanufactured alternatives—without sacrificing quality or performance. DFC calipers are designed for easy and accurate connection to the brake line, ensuring reliable performance.
Upgrade Your Brake System with DFC Calipers
Don’t let the inefficiencies of remanufactured calipers slow your shop down. DFC’s newly manufactured brake calipers provide reliable performance, easier installation, and long-term durability, all while eliminating core returns and other hidden costs.
Contact us today to explore our extensive catalog and discover how DFC calipers can enhance your operations and customer satisfaction.
 UNITED STATES